Help center › Get started
Create your first bundle (every step explained)
A walk through the bundle editor with a Fixed bundle: a tee, a hoodie, a cap and socks sold together at 15% off. Every field is explained, so this guide also helps with the other kinds of bundle.
-
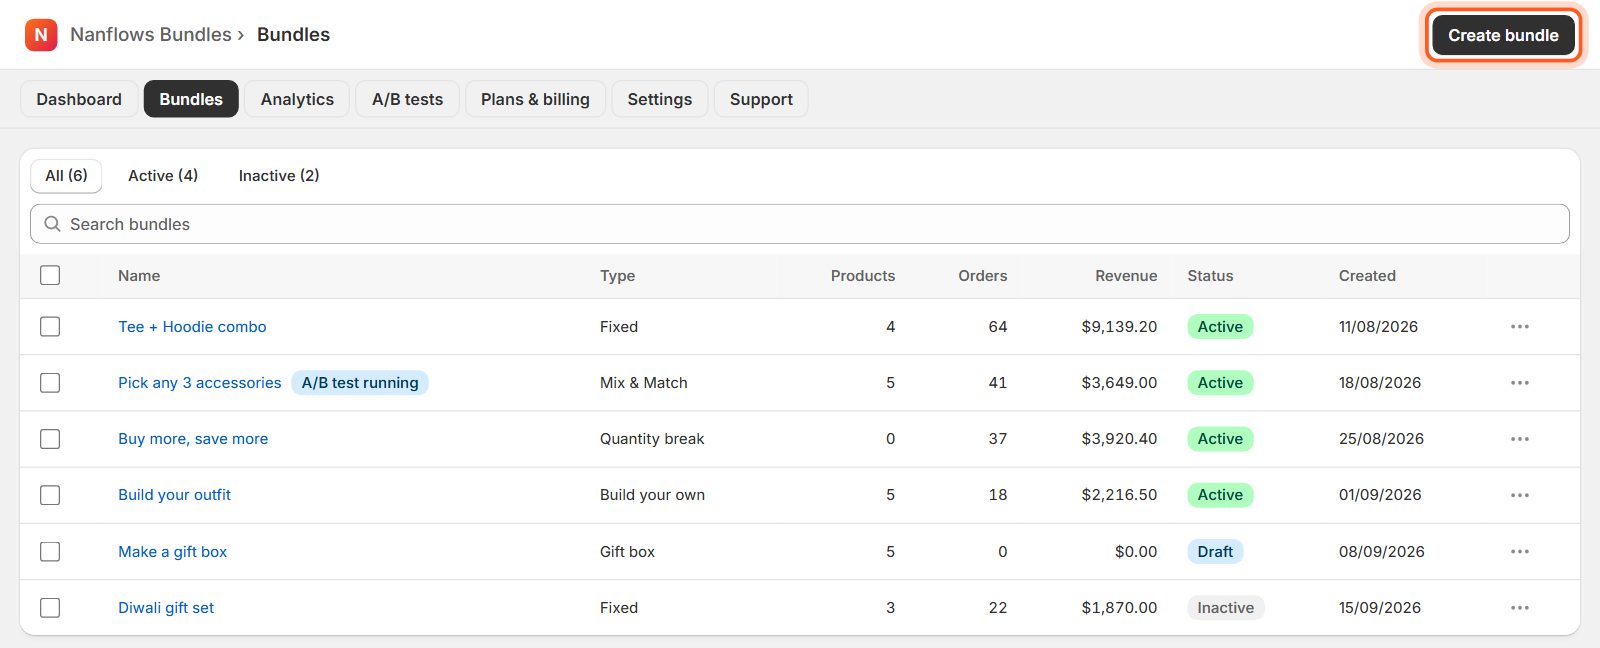
Click Bundles, then Create bundle
Open Apps → Nanflows Bundles, click Bundles in the menu at the top, then Create bundle at the top right.
-
The editor: six steps, with a live preview
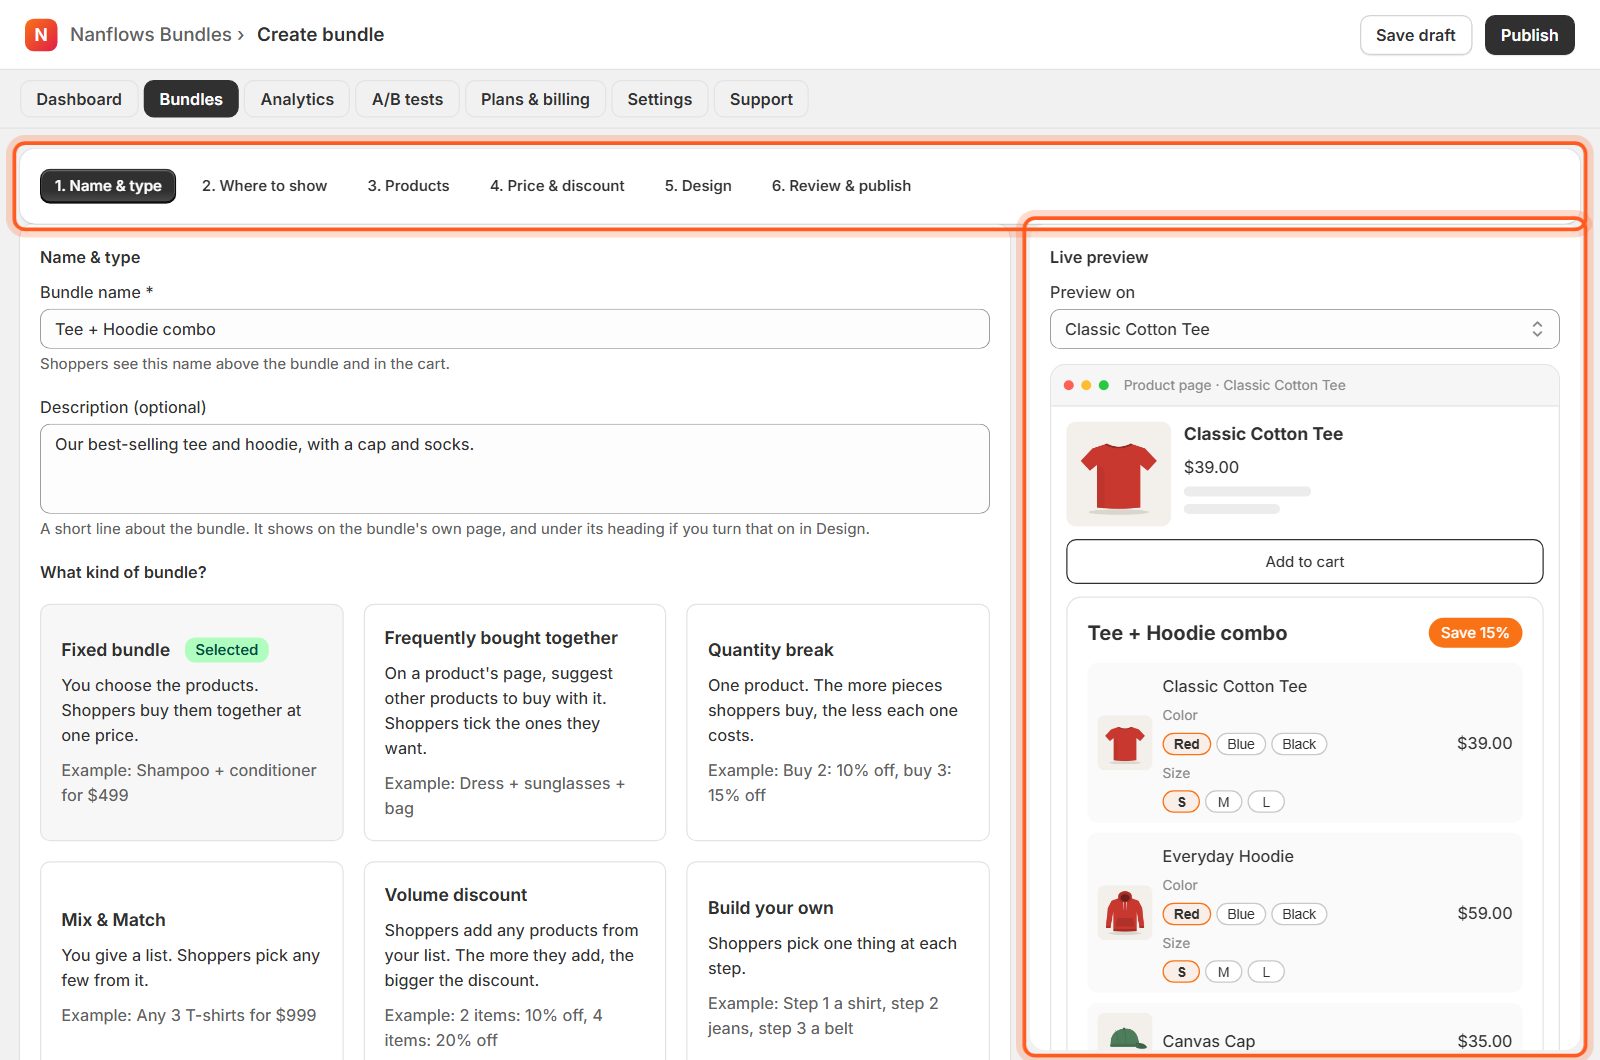
The steps are along the top: 1. Name & type, 2. Where to show, 3. Products, 4. Price & discount, 5. Design, 6. Review & publish. Click any step to jump to it, or use Next and Back at the bottom. The Live preview on the right shows the bundle as shoppers will see it, and changes as you type.
-
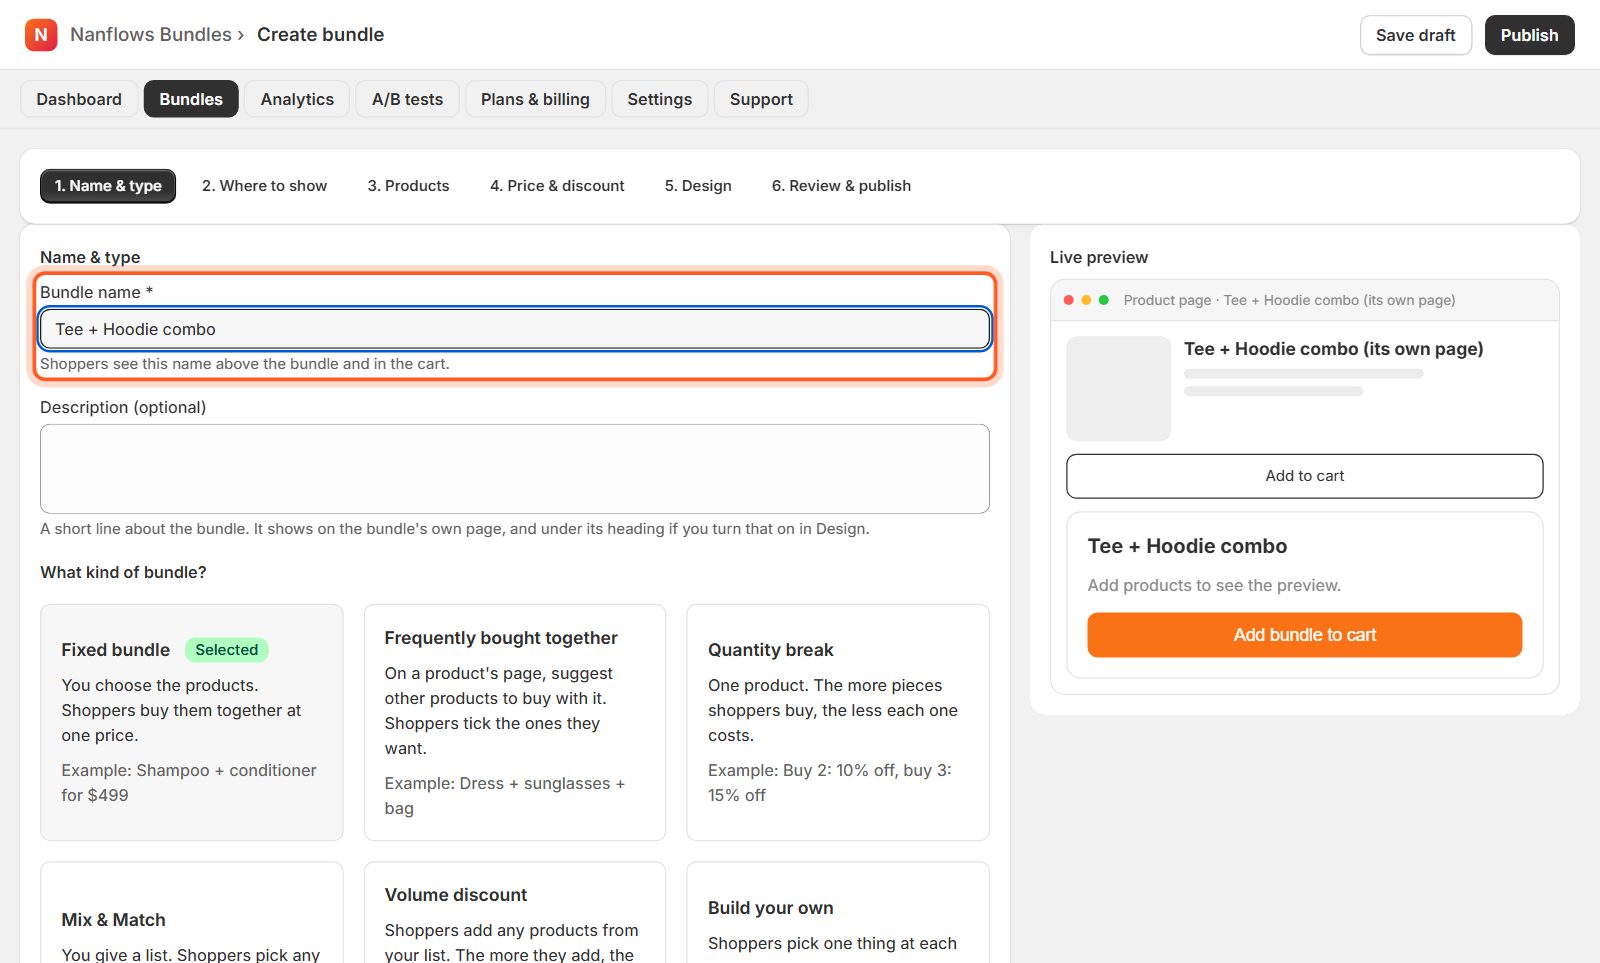
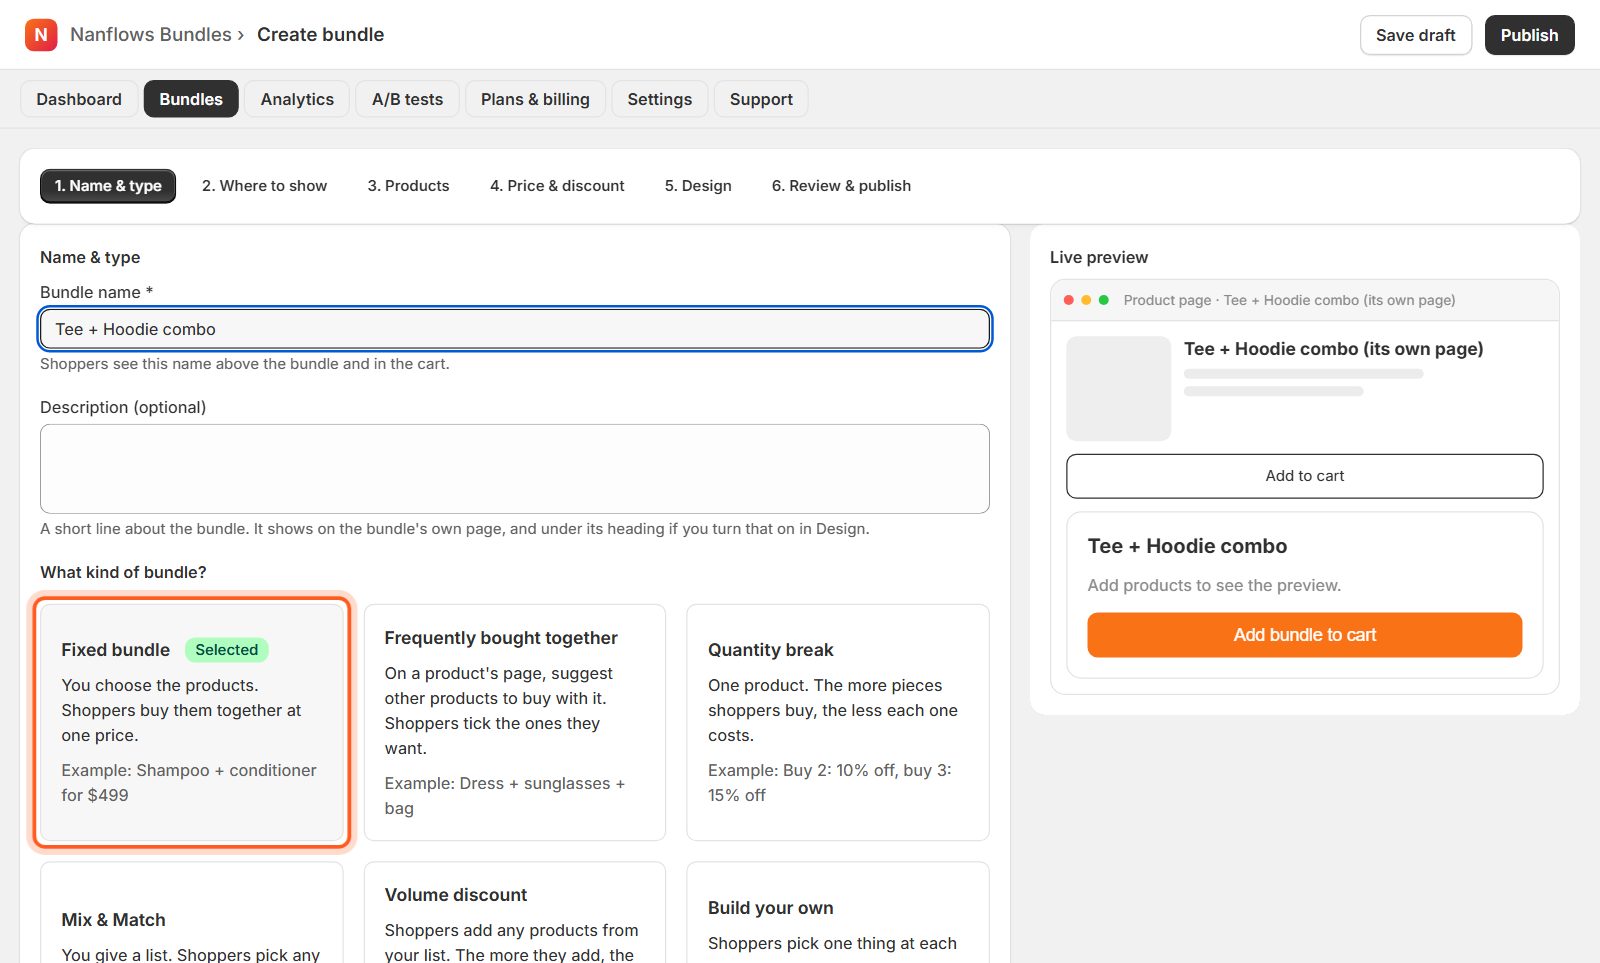
Type the bundle name
Shoppers see this name above the bundle and in the cart. Fields with * must be filled in.
-
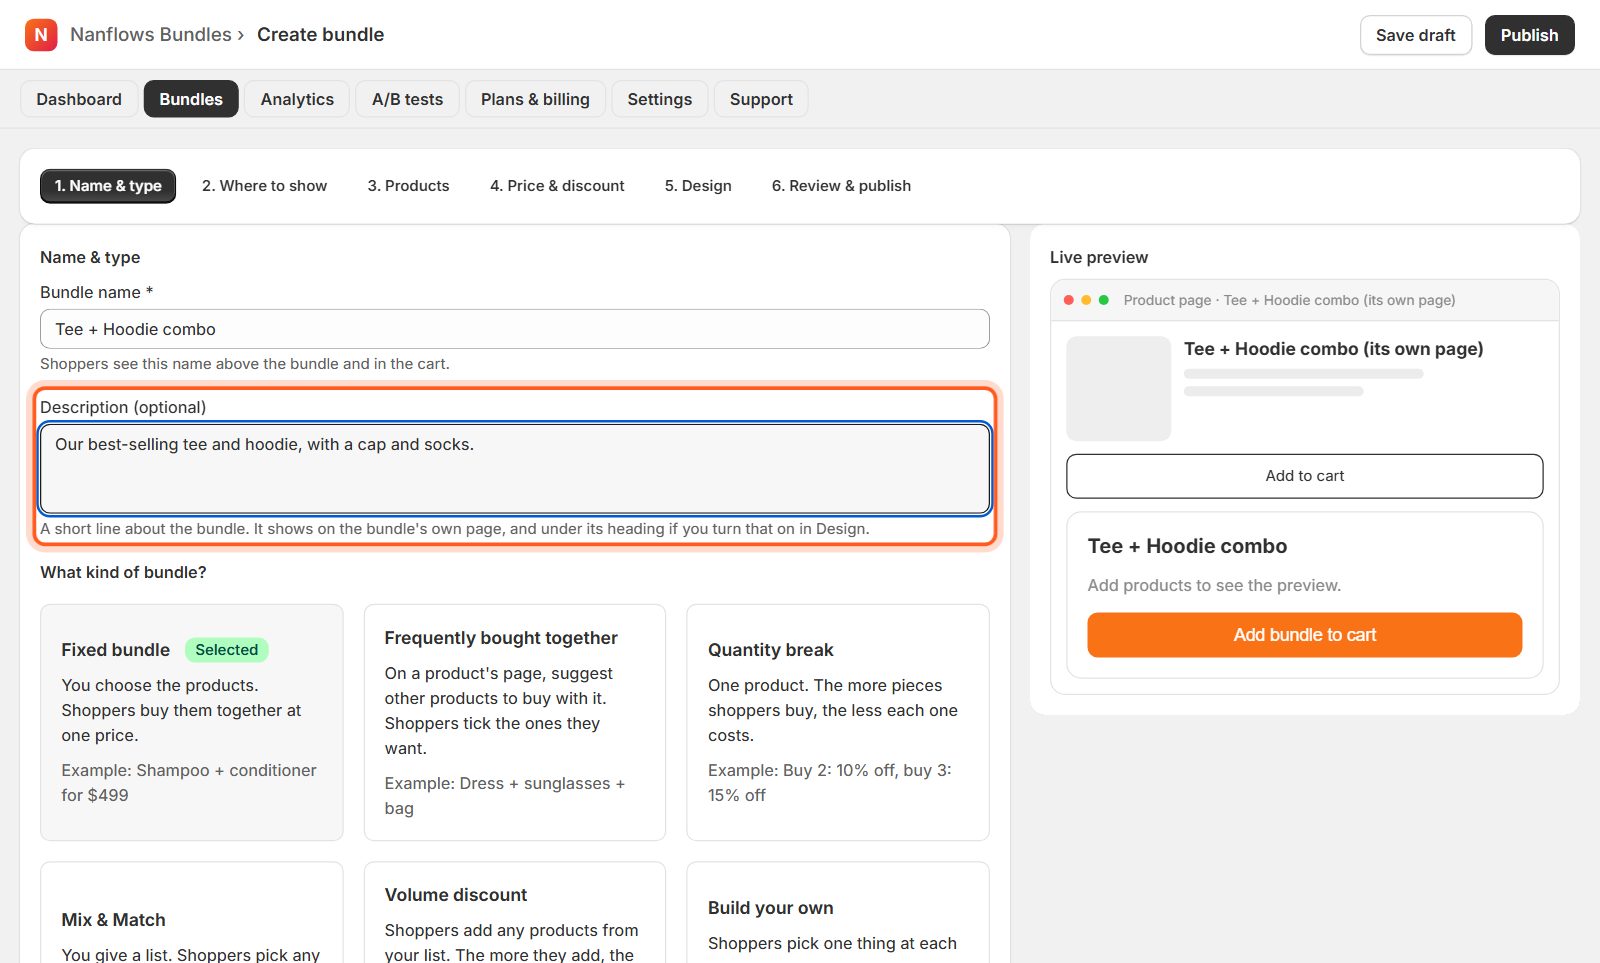
Add a description (optional)
One short line about the bundle. It shows on the bundle's own page, and under its heading on product pages if you turn that on in Design.
-
Choose what kind of bundle
Each card says what the bundle does, with an example. Here we click Fixed bundle: you choose the products, and shoppers buy them together. Not sure which one fits? See Which bundle should I use? The kind can't be changed after saving (duplicate the bundle instead).
-
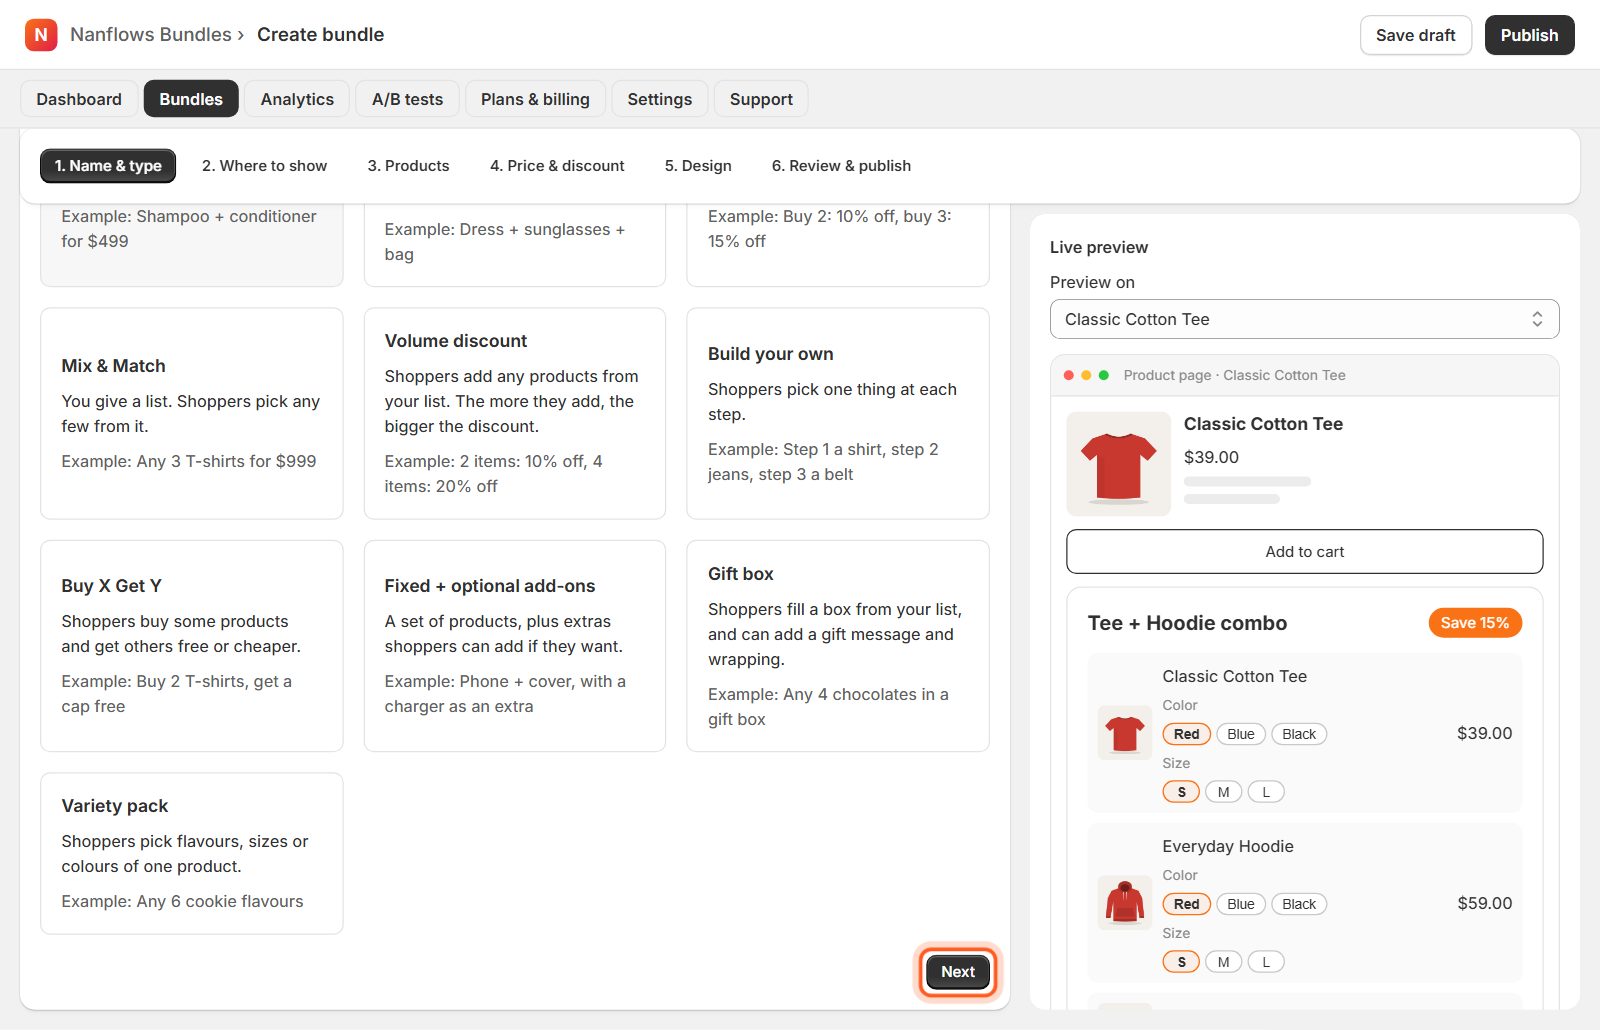
Click Next
Next takes you to 2. Where to show. If something required is missing, the step turns red and a box lists what to fill in.
-
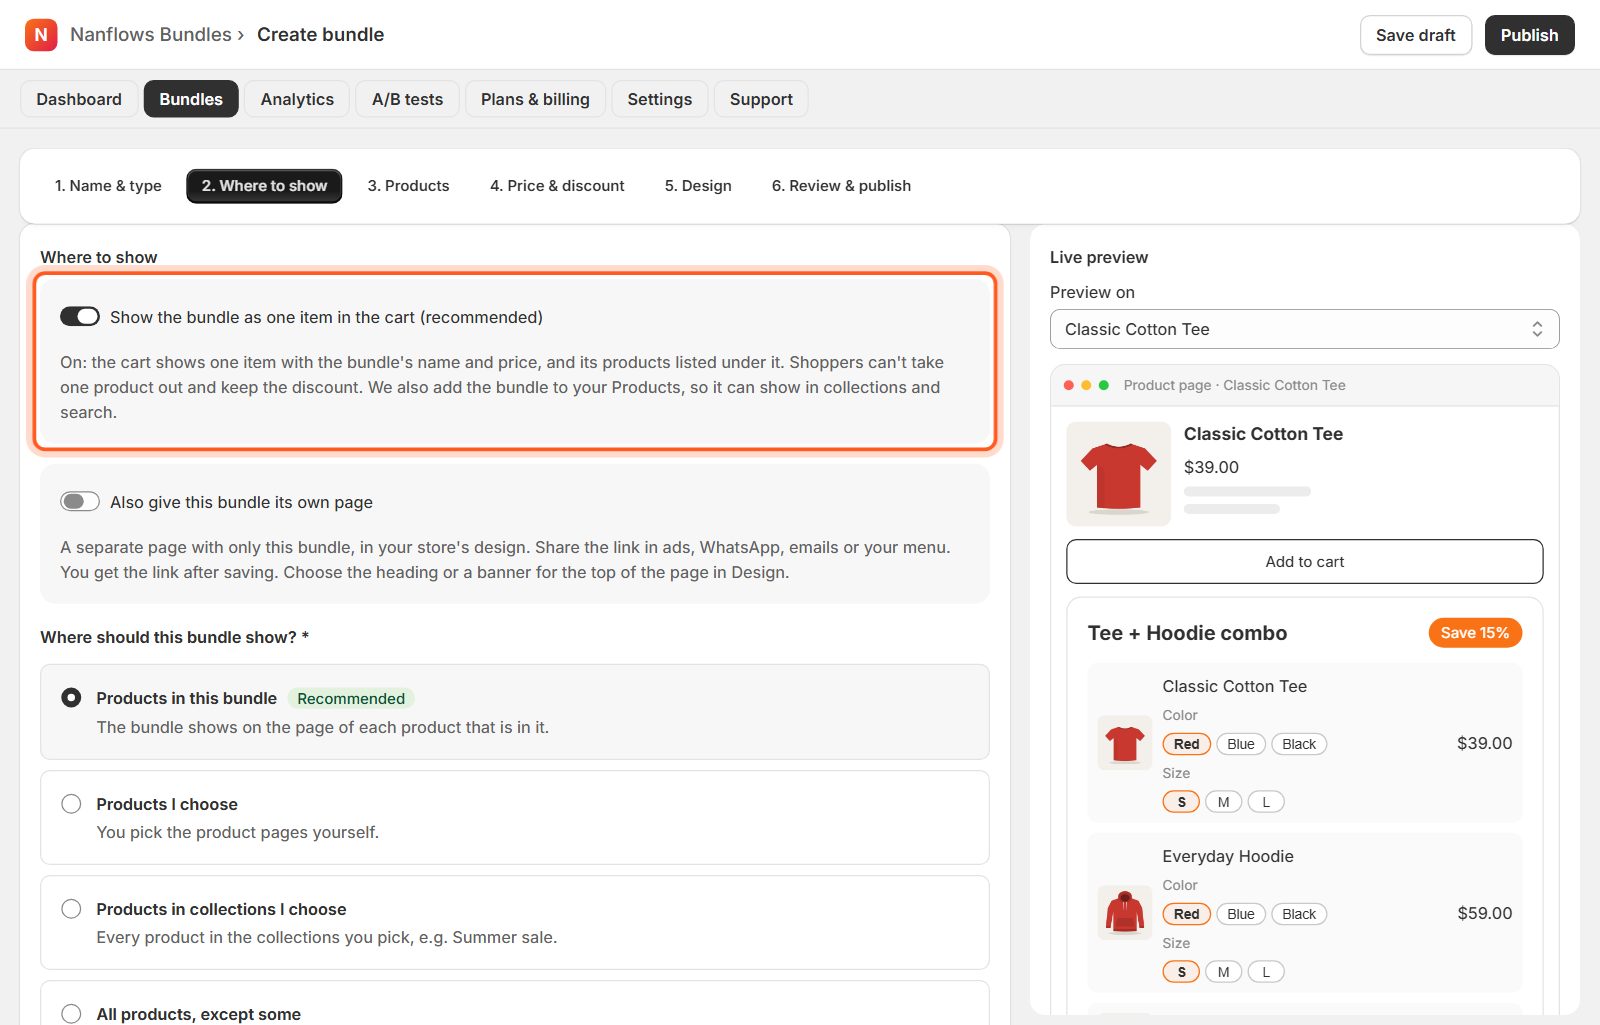
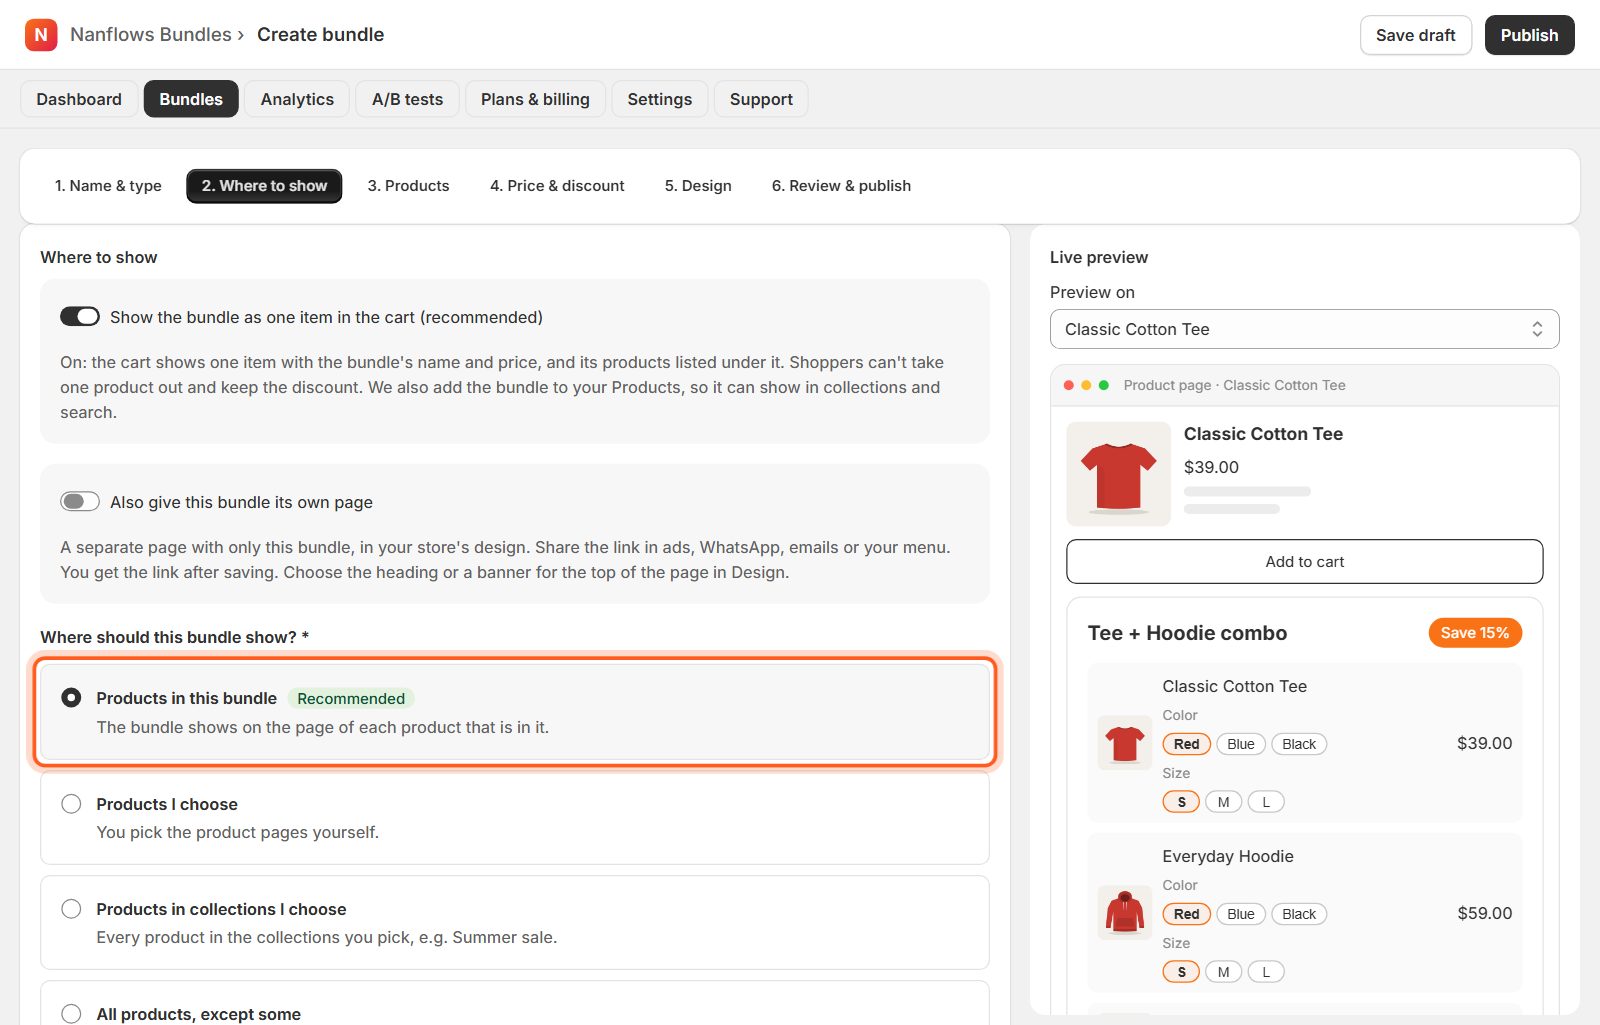
Keep the bundle as one item in the cart (recommended)
On: the cart shows one line with the bundle's name and price, with its products listed under it, and shoppers can't take one product out and keep the discount. We also add the bundle to your Products, so it can show in collections and search. Off: each product is its own line in the cart; if a shopper removes one, the others go back to full price.
-
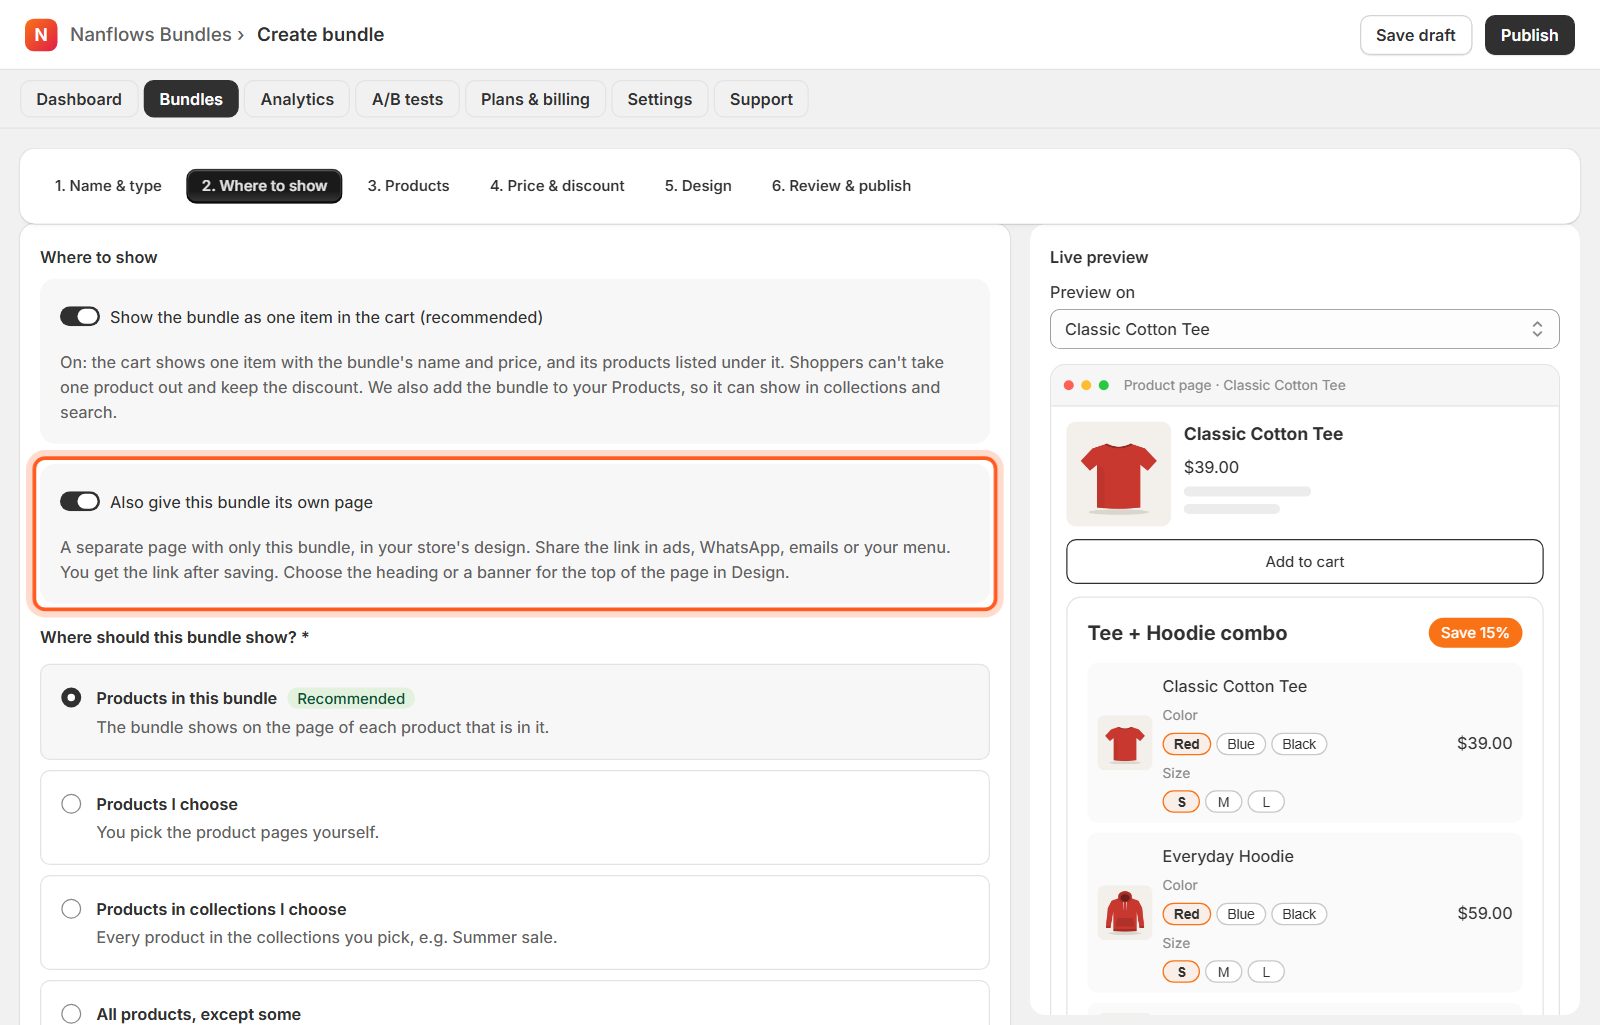
Give it its own page (optional)
Turn on Also give this bundle its own page to get a page with only this bundle, in your store's design. Share the link in ads, WhatsApp, emails or your menu. The link appears here after you save. Choose a heading or a banner for the top of that page in Design.
-
Choose where the bundle shows
Products in this bundle shows it on the page of each product in it: the usual choice. Or pick Products I choose, Products in collections I choose, All products, except some or All products. When you choose products or collections, a Pick button appears right under that card.
-
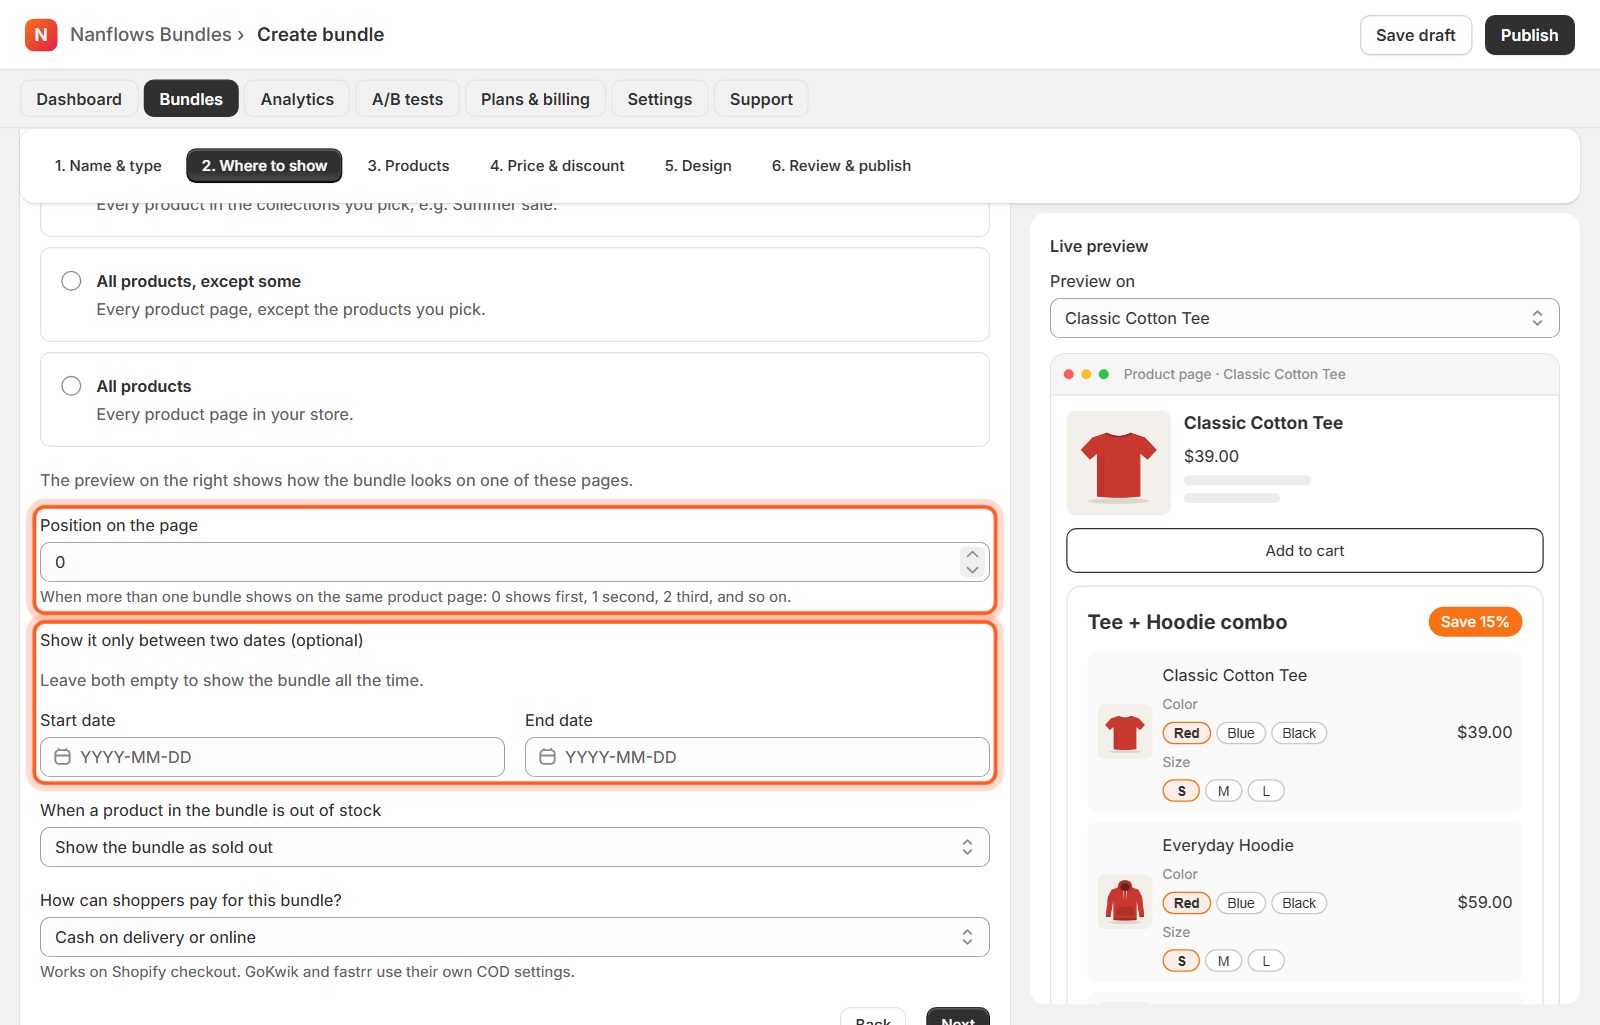
Set the position and dates (optional)
Position on the page matters only when several bundles show on the same product page: 0 shows first, 1 second, 2 third. To run a sale, pick a Start date and an End date on the calendar; the bundle then appears and disappears by itself. Leave both empty to show it all the time.
-
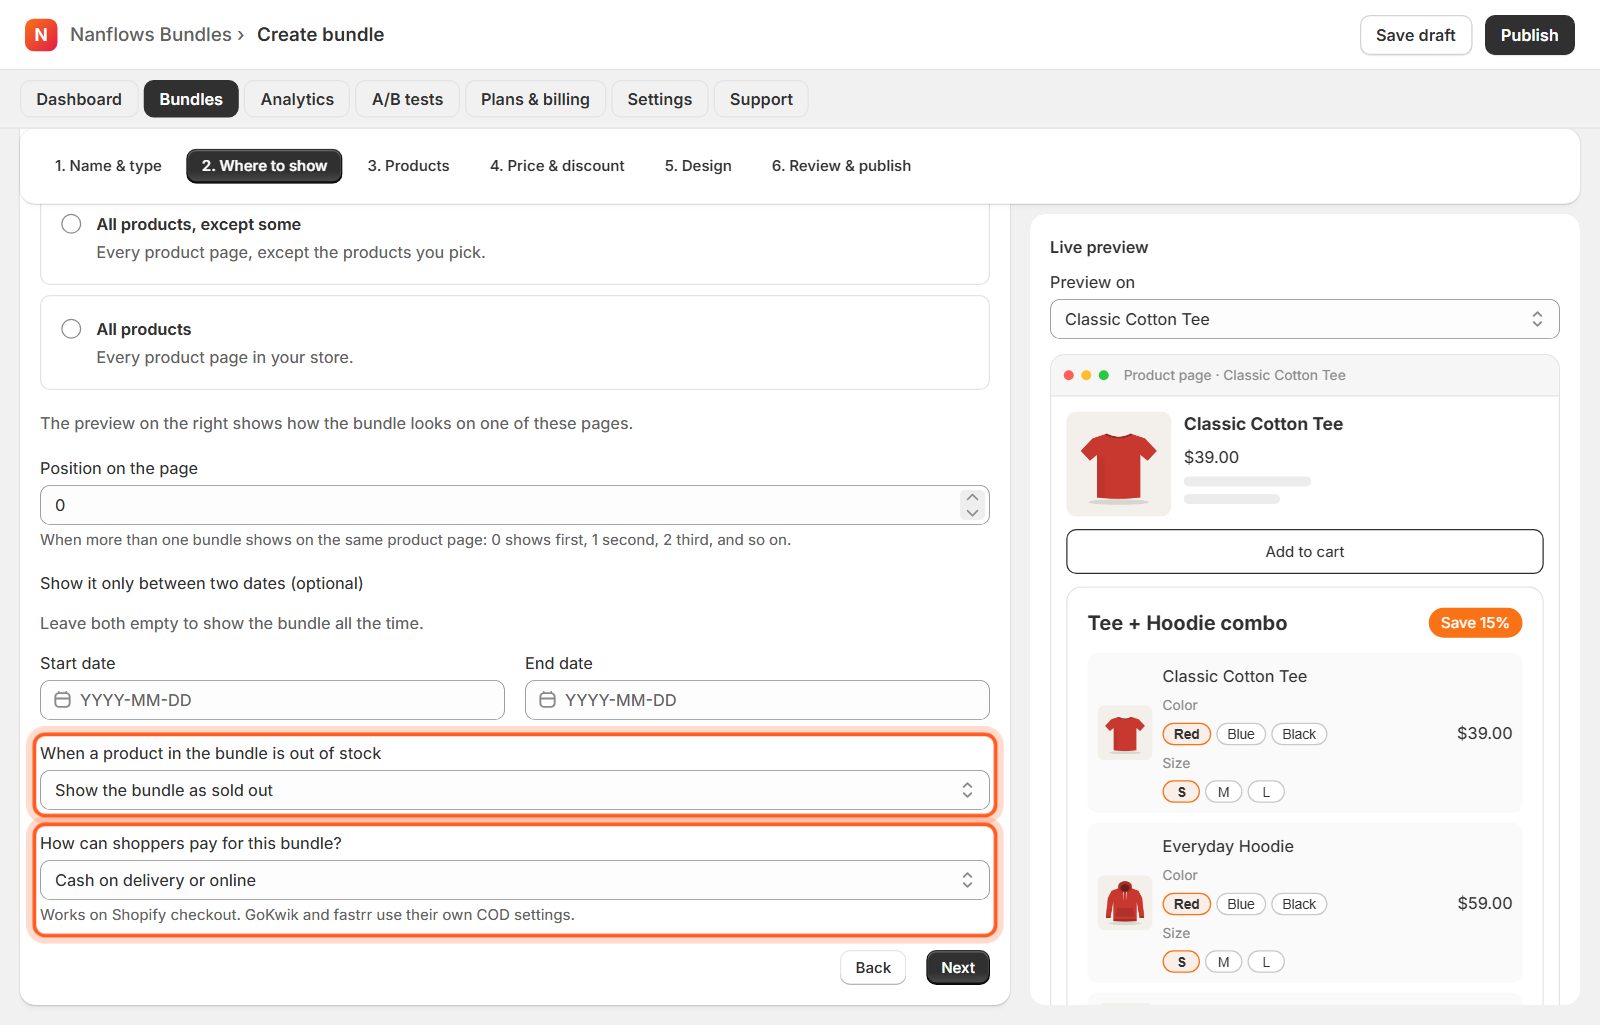
Out of stock and payment
When a product in the bundle is out of stock: show the bundle as sold out, or hide it until the product is back. How can shoppers pay for this bundle?: cash on delivery or online, online payment only, or cash on delivery only (on Shopify checkout).
-
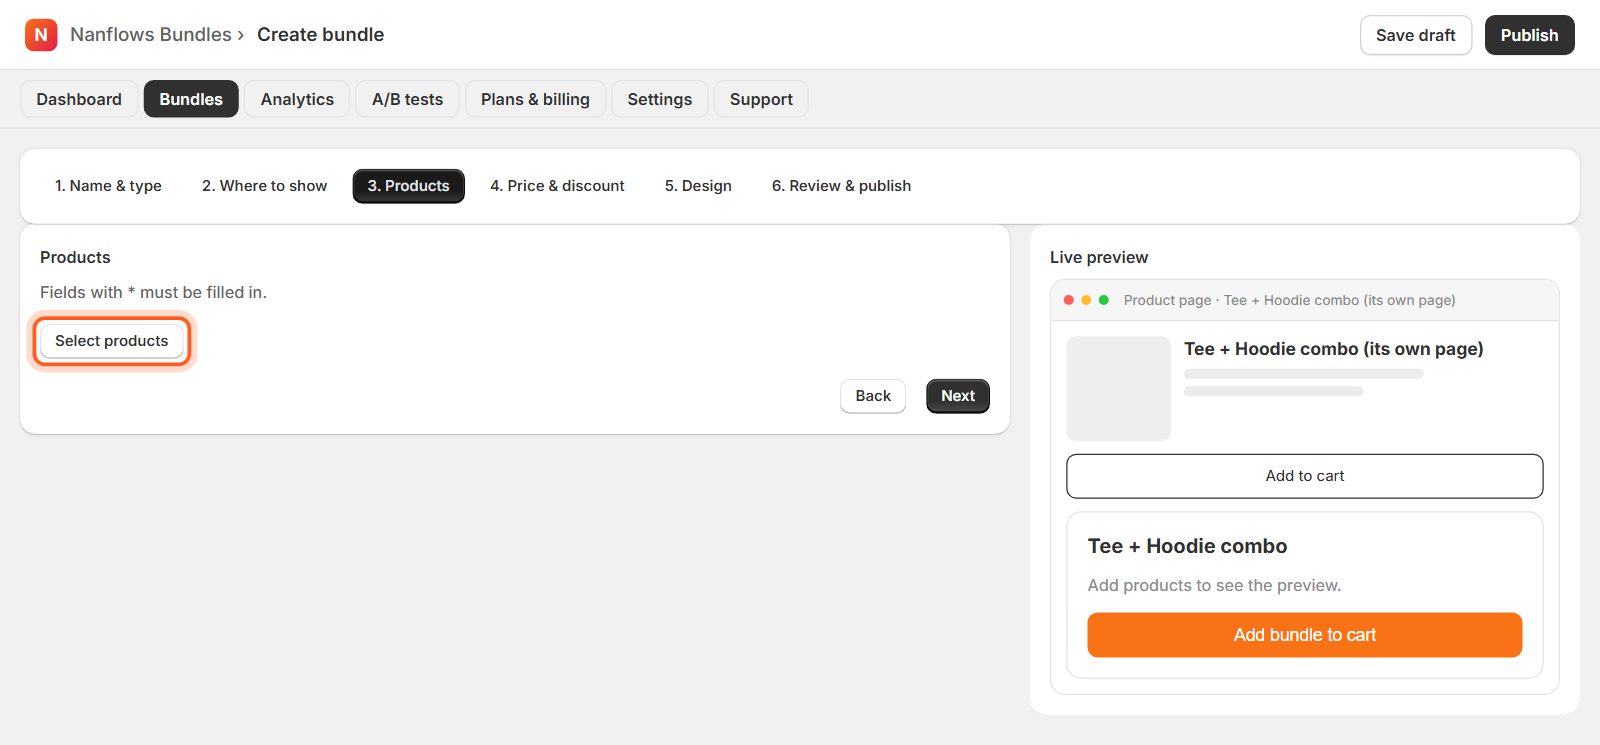
Products: click Select products
Click 3. Products, then Select products. Shopify's product picker opens: tick the products for the bundle and click Select. Products already in the bundle open ticked, so you can add and remove in one go.
-
Check the products and quantities
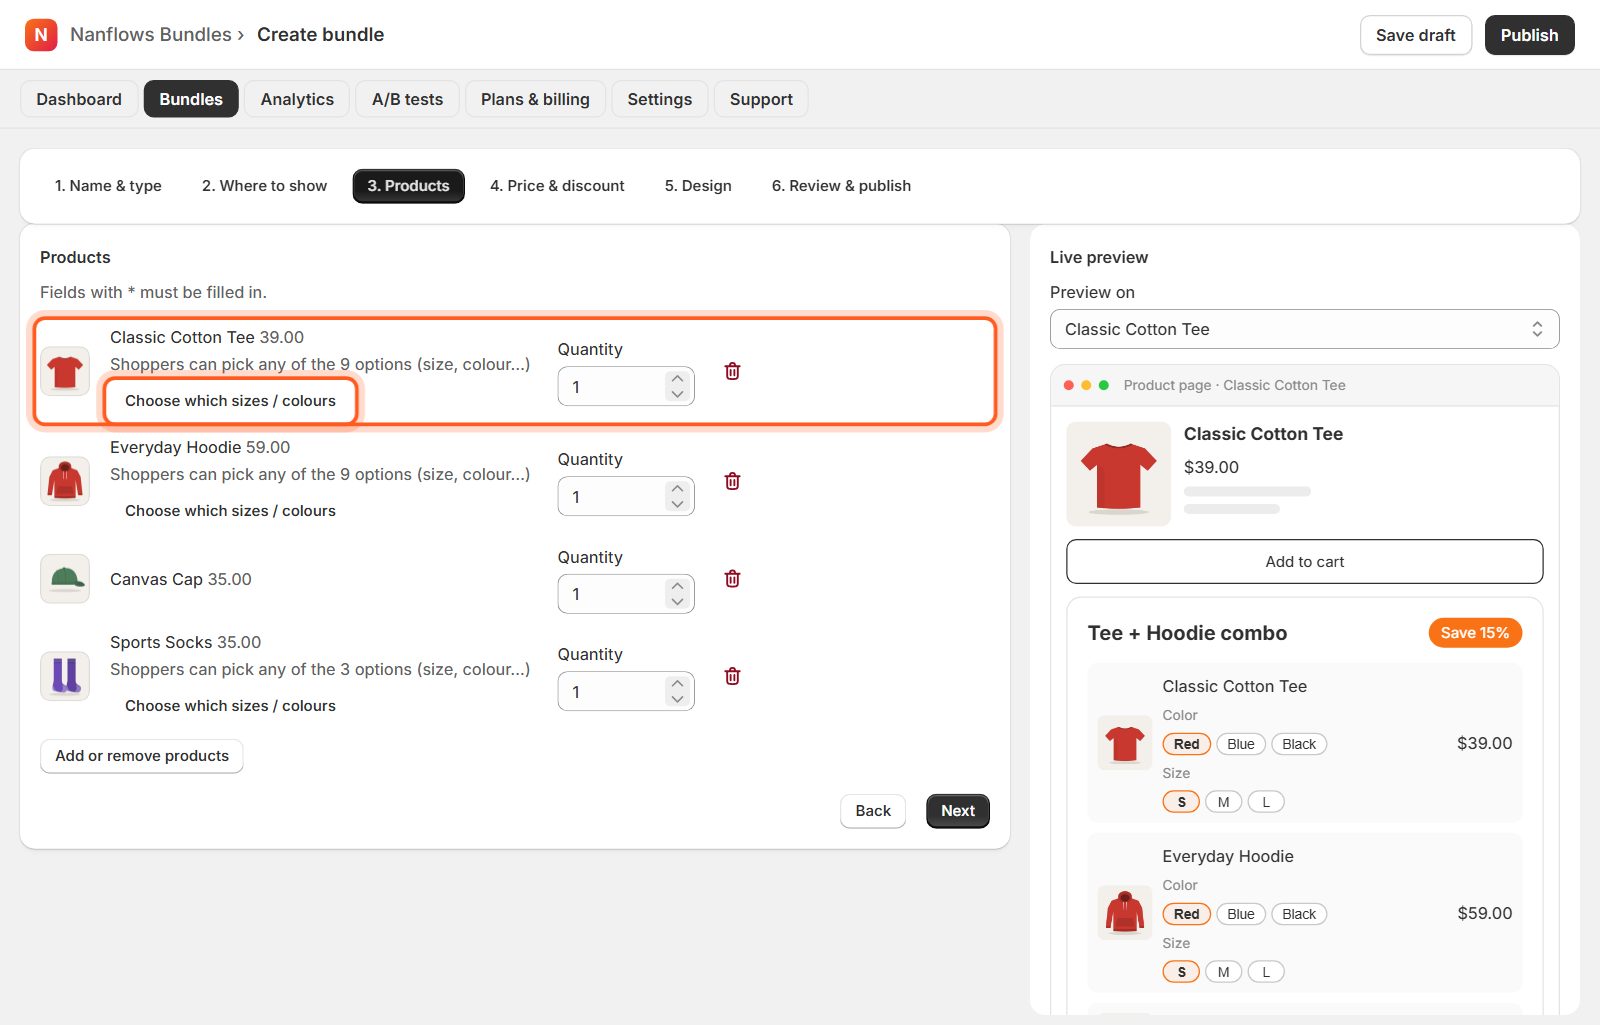
The products appear with their photo and price. Change the Quantity to put more than one of a product in the bundle, or click the bin to remove one. For a product with sizes or colours, shoppers can pick any of them on your store; click Choose which sizes / colours to allow only some.
-
Price & discount: choose how it's priced
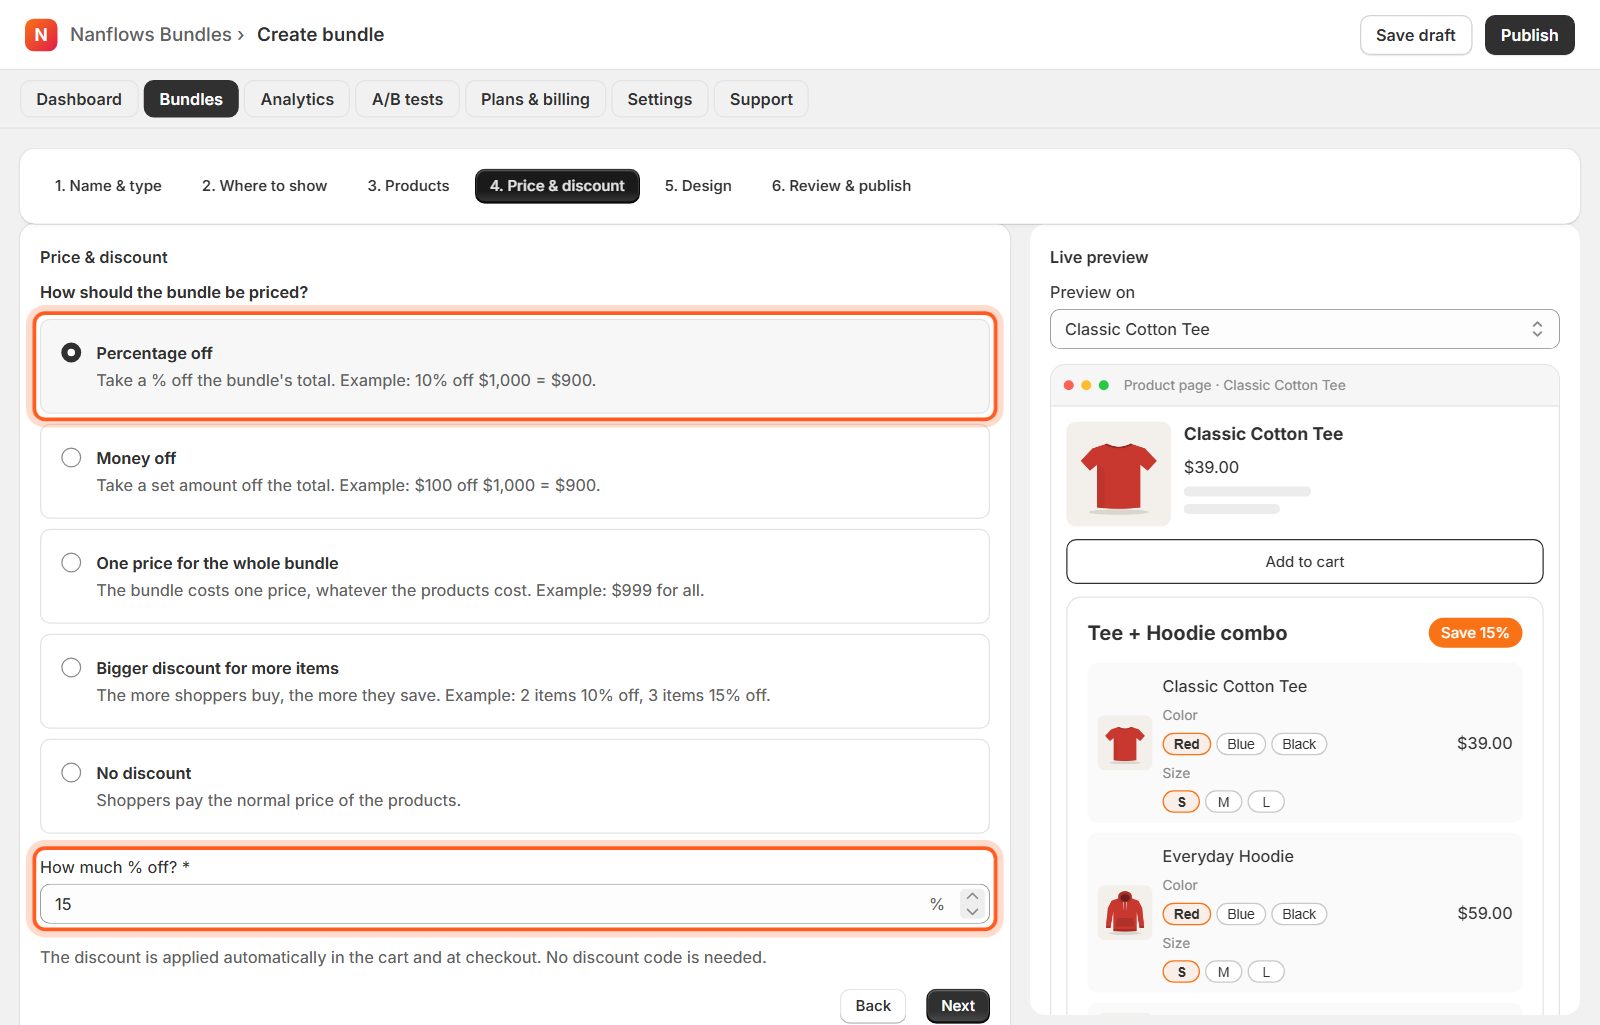
Click 4. Price & discount. Choose Percentage off, Money off, One price for the whole bundle or No discount, then type the amount. Here: 15% off. The discount is applied automatically in the cart and at checkout; shoppers need no code. See Prices and discounts.
-
Design: heading, colours and button
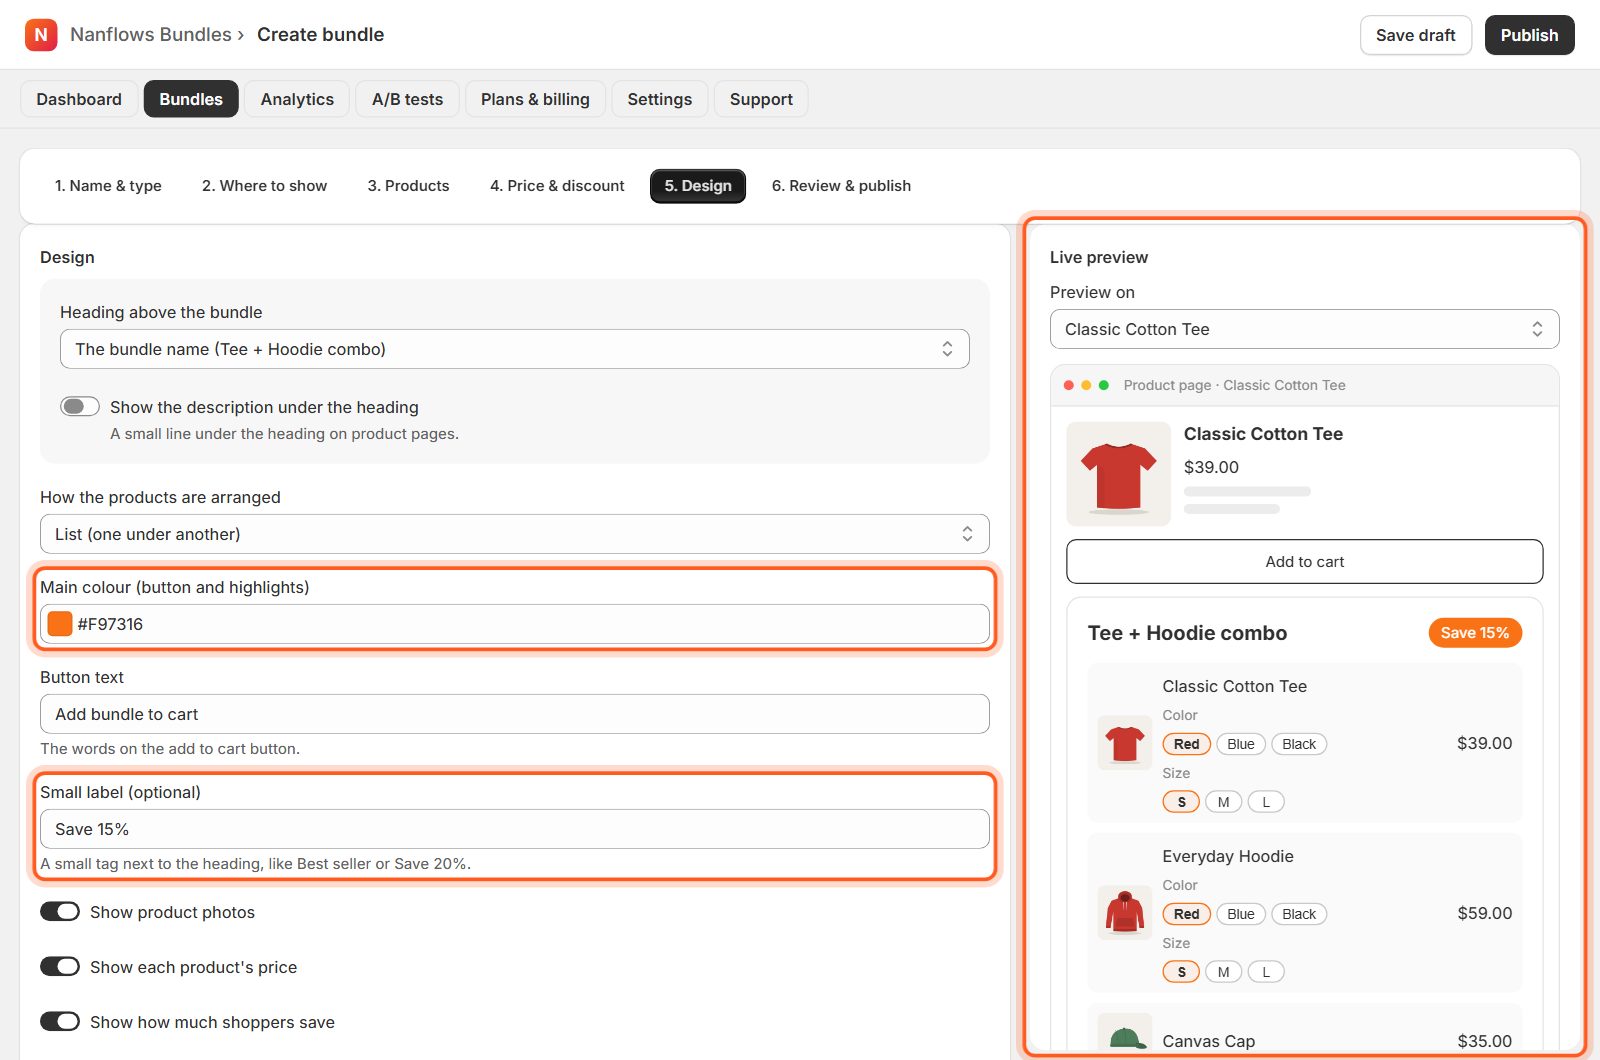
Click 5. Design. Choose the Heading above the bundle (the bundle name, other text or none), how the products are arranged, your Main colour, the Button text and a Small label such as Save 15%. Switches show or hide product photos, prices and the savings. Watch the preview change as you click.
-
Check the bundle on another product page
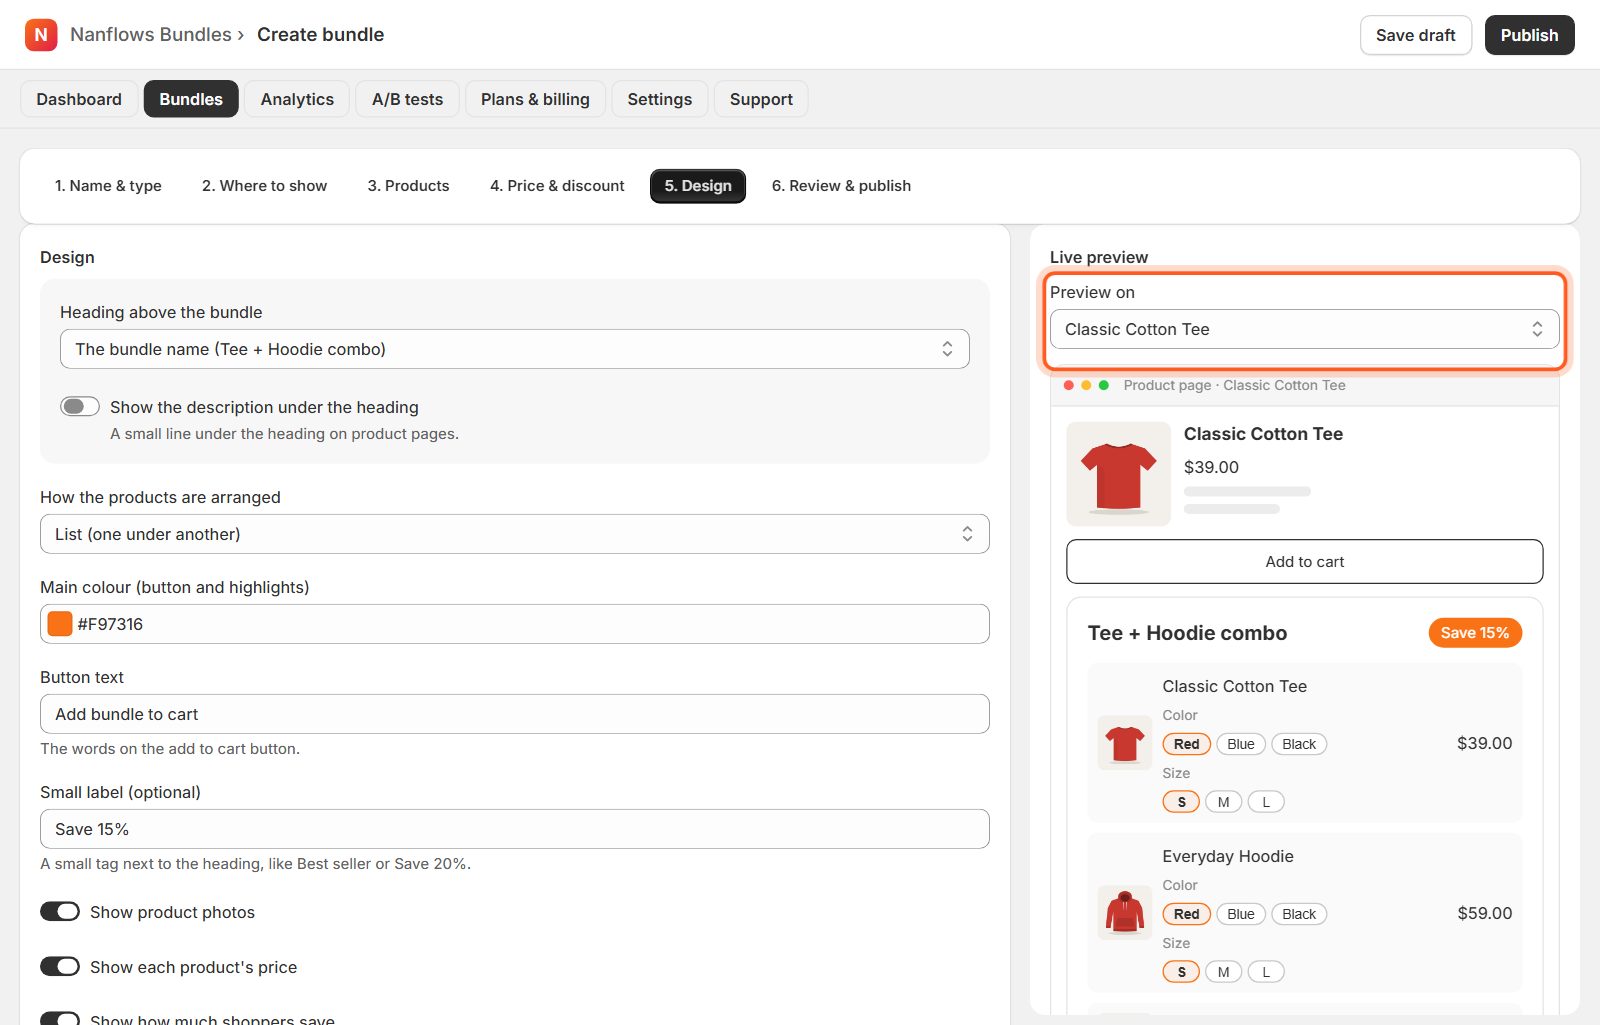
The preview shows the bundle on one of the pages it appears on. Use Preview on to see it on another product, or on the bundle's own page.
-
Review and click Publish bundle
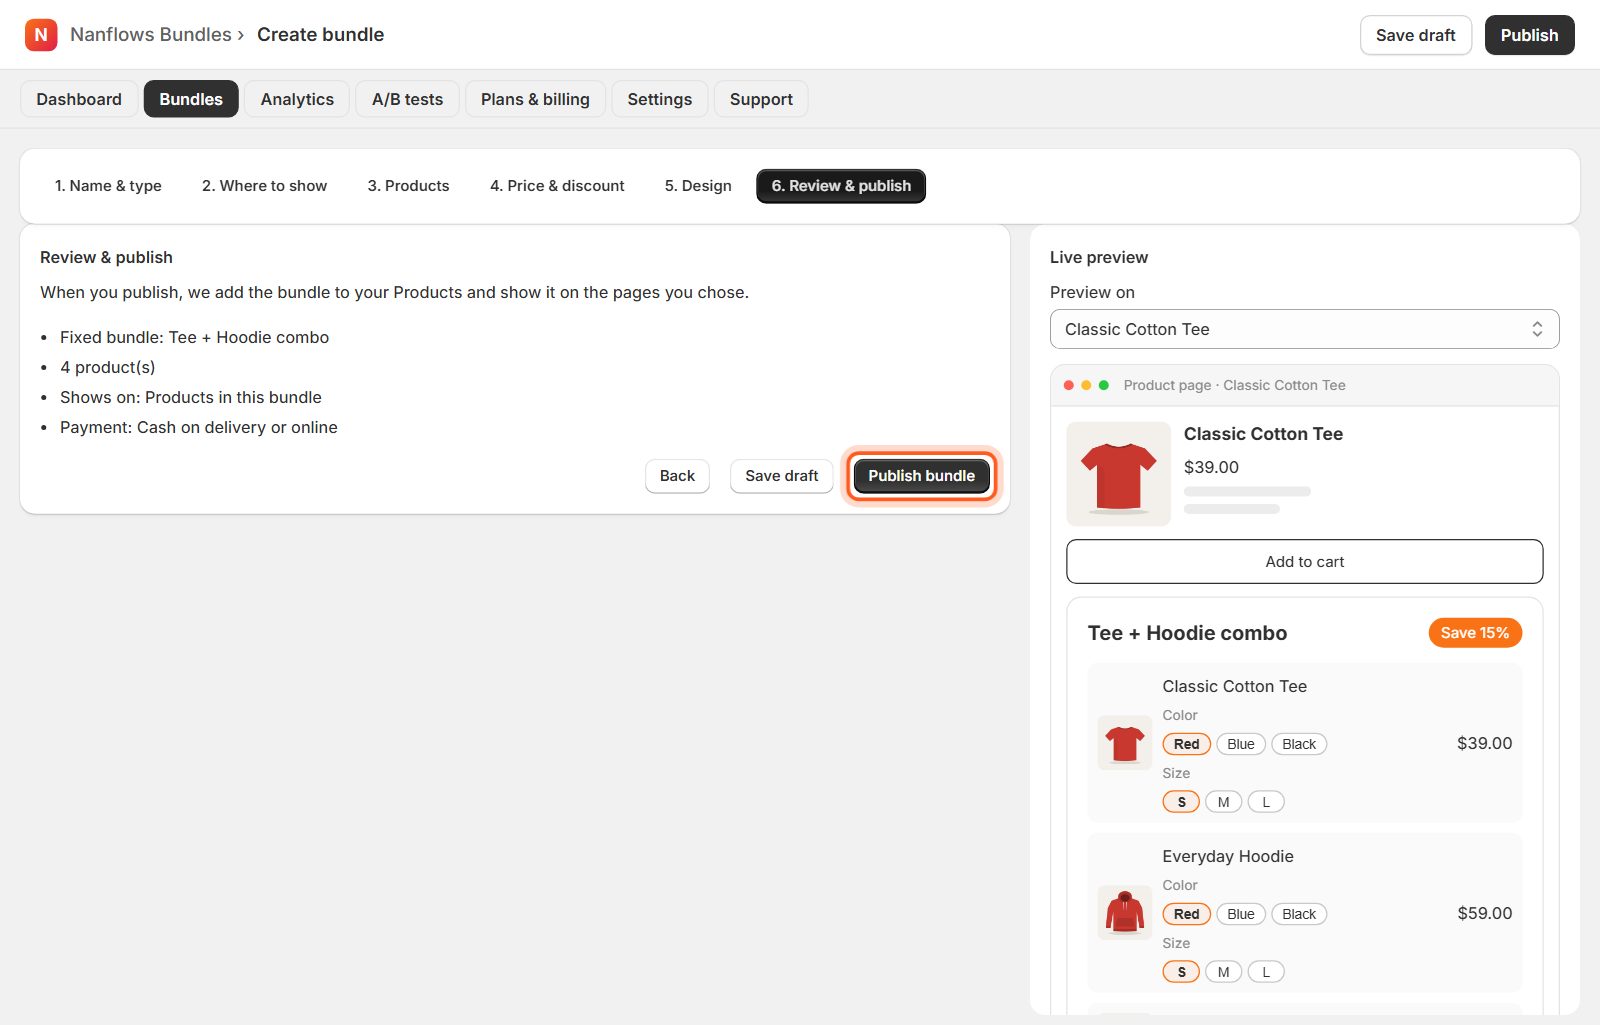
6. Review & publish sums up the bundle. Click Publish bundle: it goes live and its discount starts working. Save draft keeps it hidden until you are ready. You can also save from the buttons at the top right at any time.
-
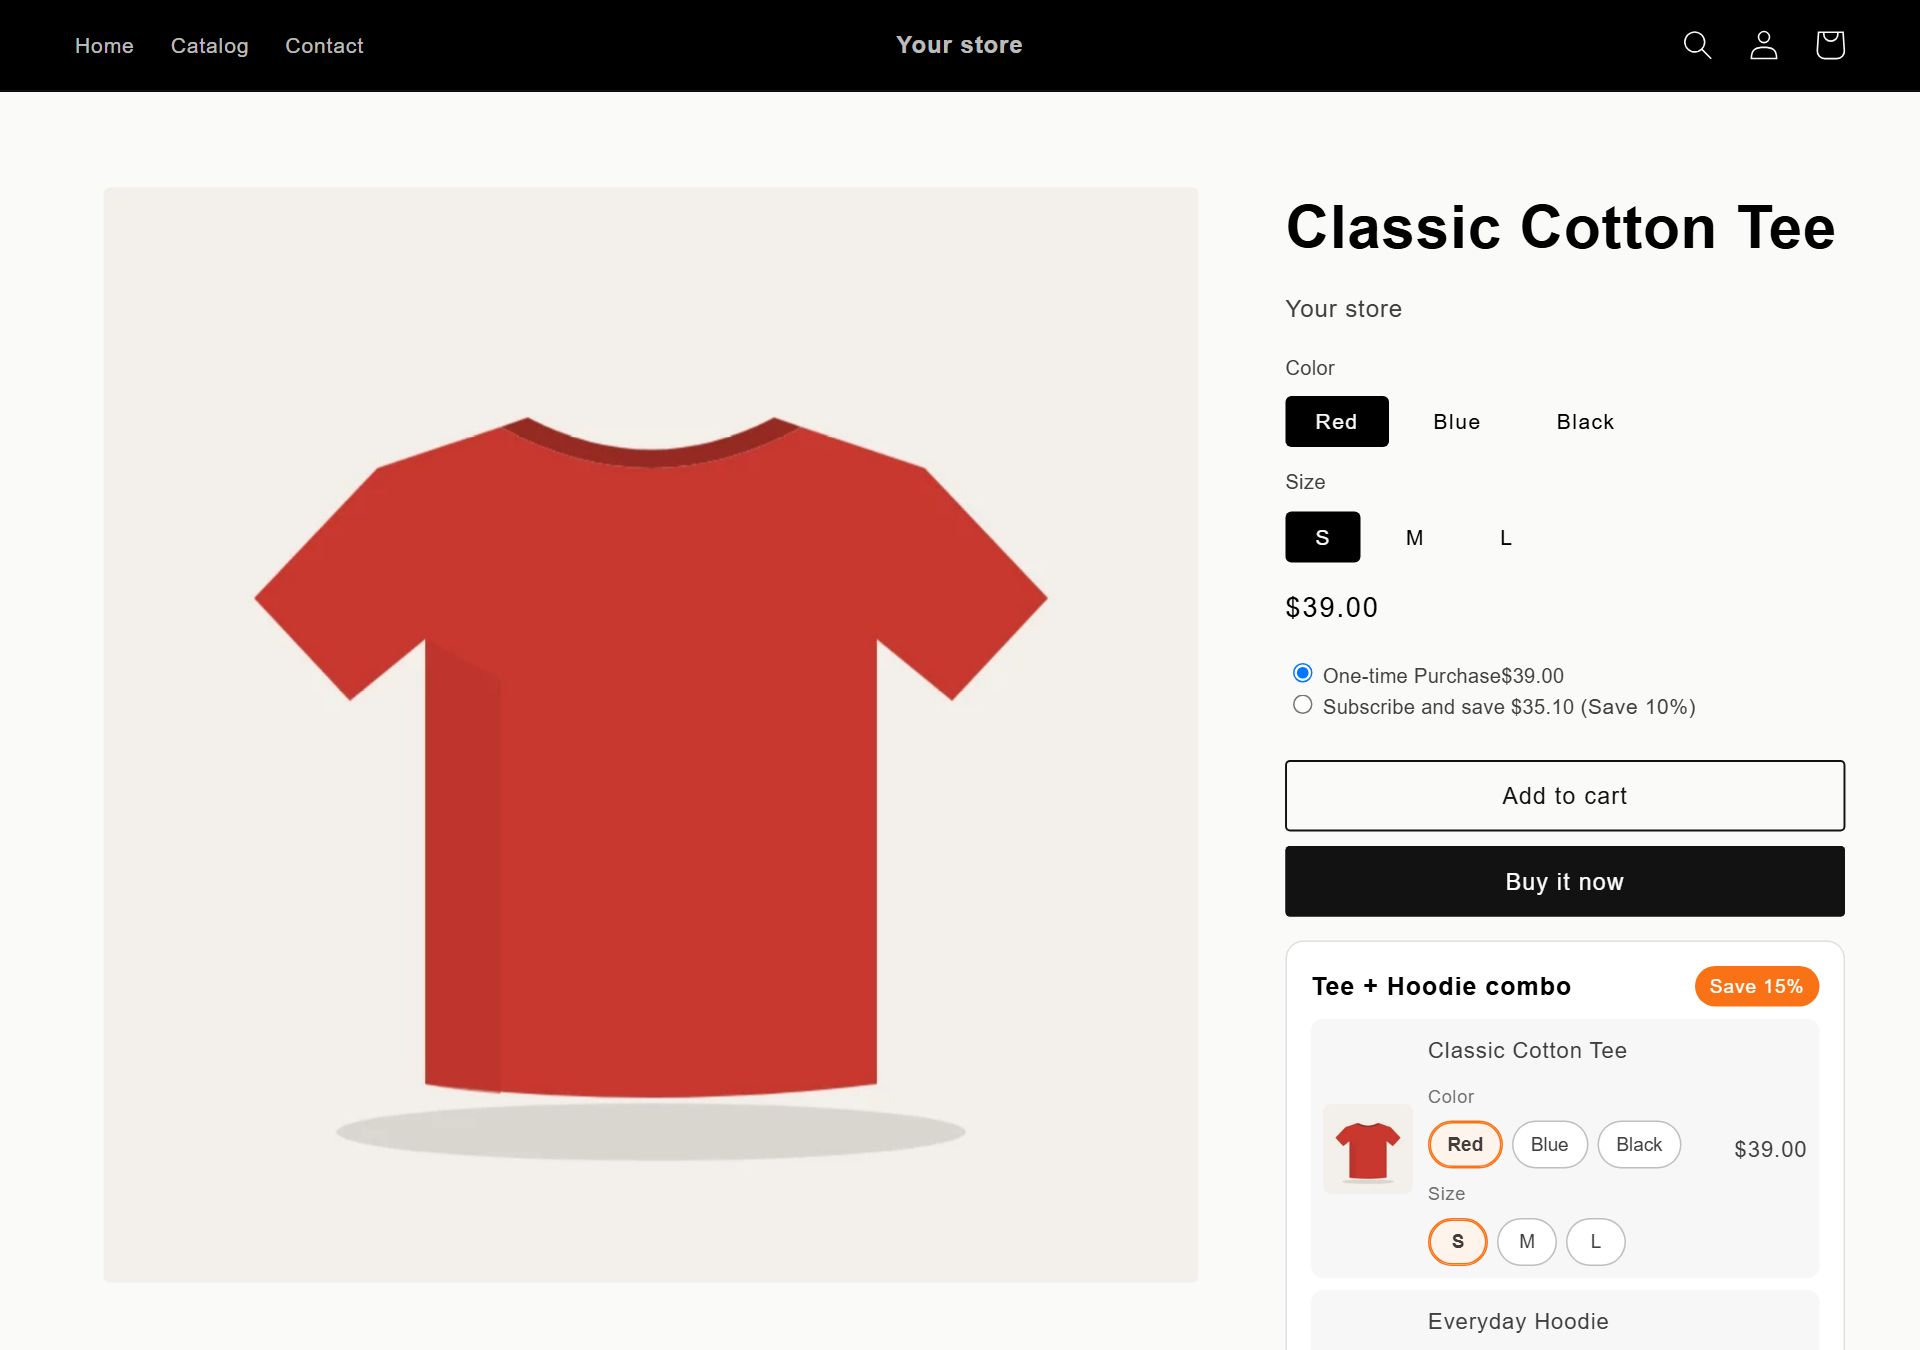
Done: the bundle is on your store
Shoppers choose sizes and colours, see the bundle price and what they save, and add everything with one click.
-
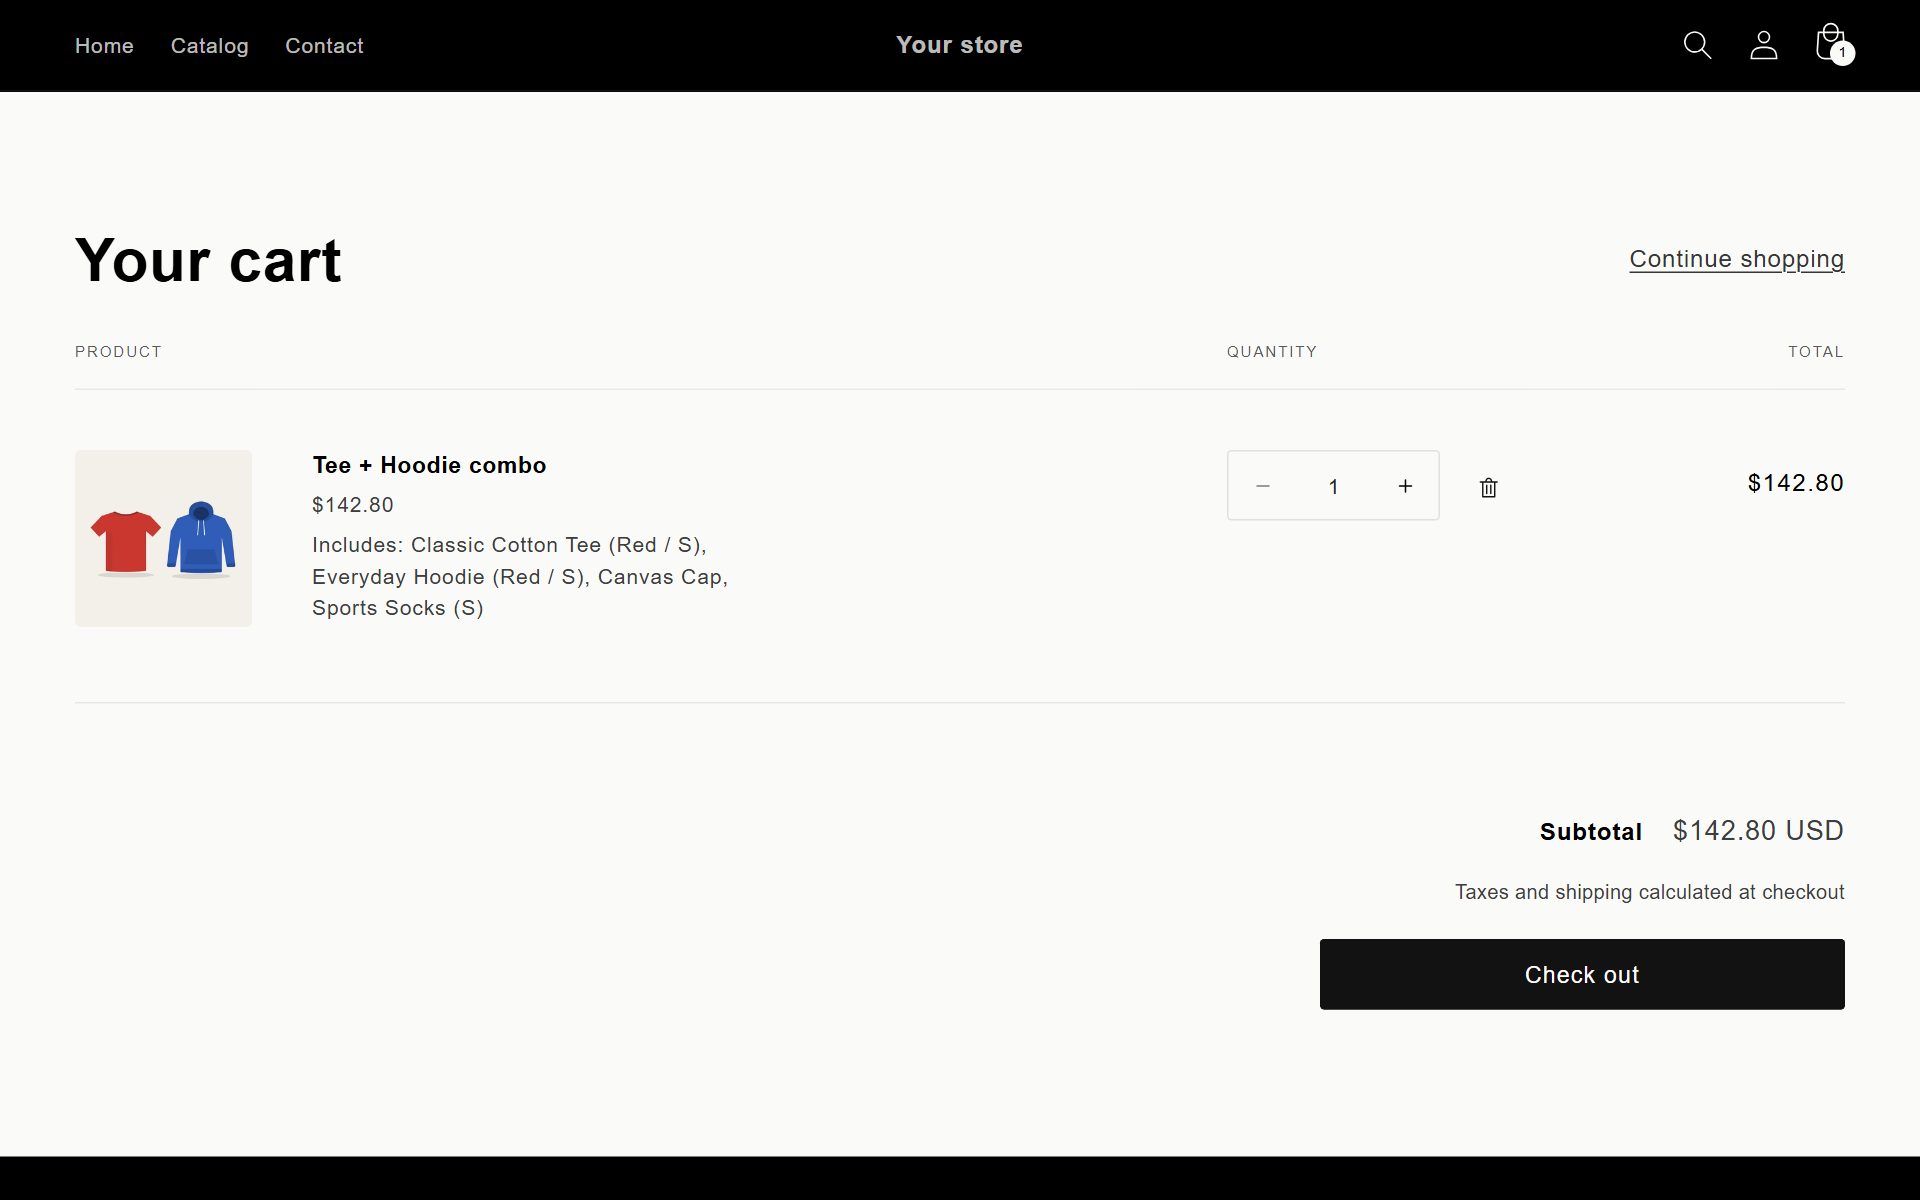
In the cart: one line with everything in it
With Show the bundle as one item in the cart on, the cart shows one line with the bundle price, and the products in it listed under it. Your stock goes down for each product as usual.
-
Change it later
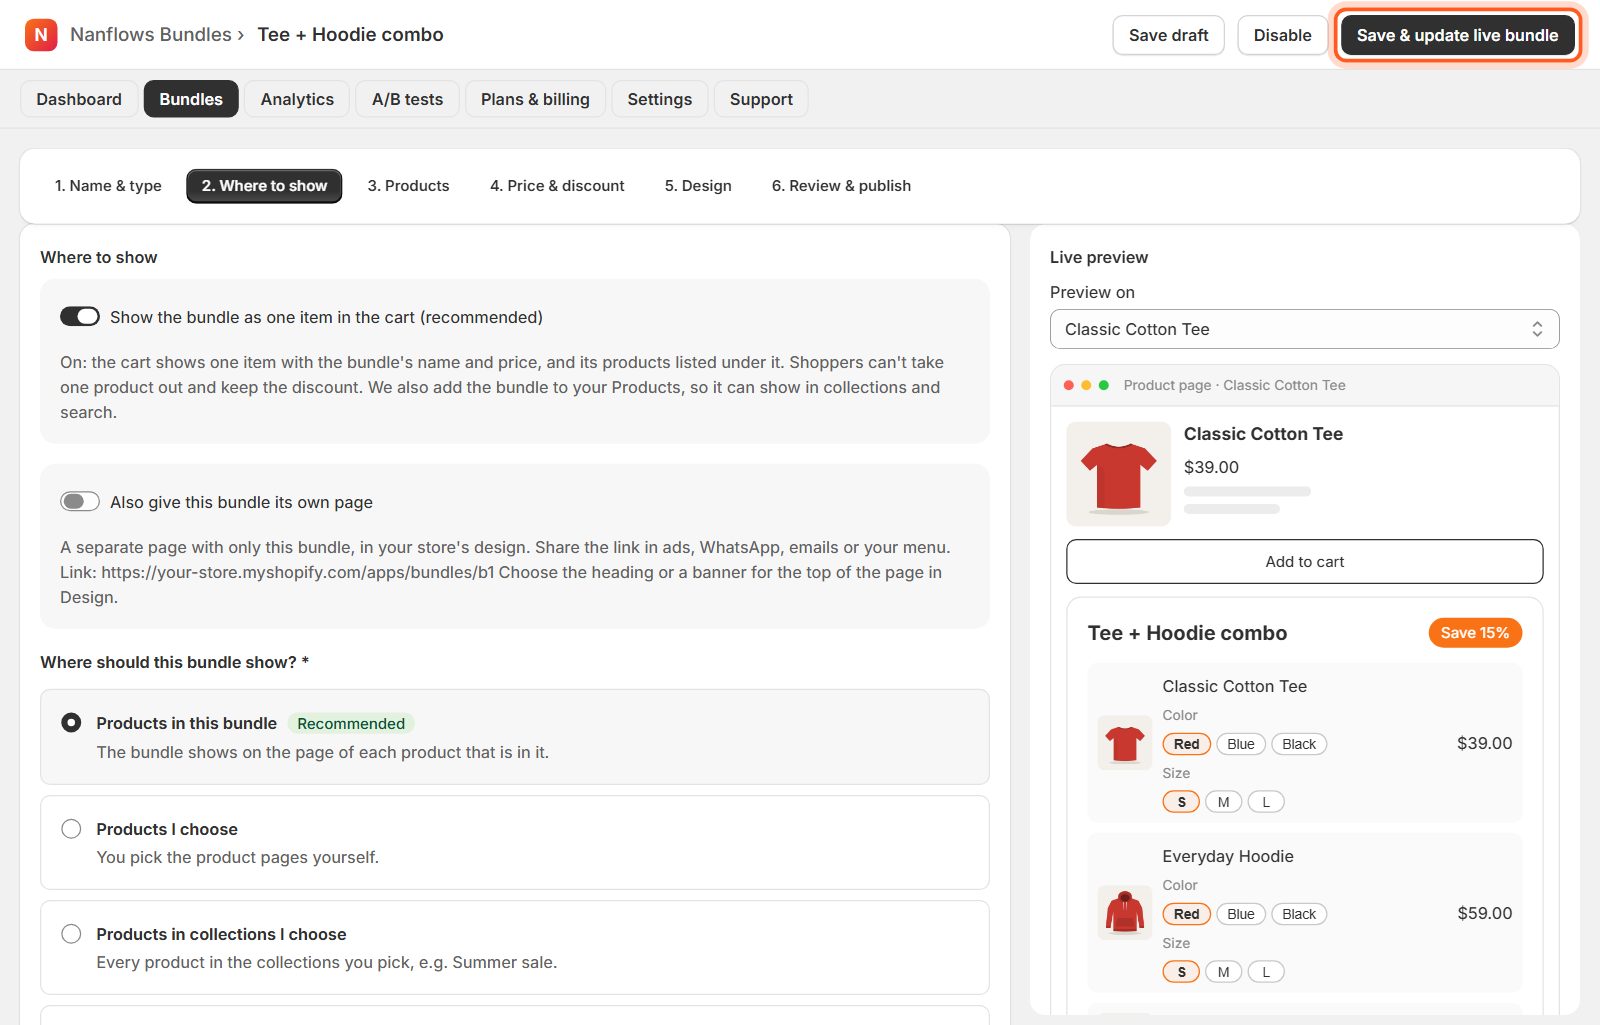
Open Bundles and click the bundle's name. Change anything and click Save & update live bundle: your store updates within seconds. See Manage your bundles.
Nanflows Bundles for Shopify · Need help? support@nanflows.com