Help center › Get started
Create your first bundle (every step explained)
A walk through the bundle editor with a Fixed bundle: a hoodie, joggers and a cap sold together for $89. Every field is explained, so this guide also helps with the other kinds of bundle.
-
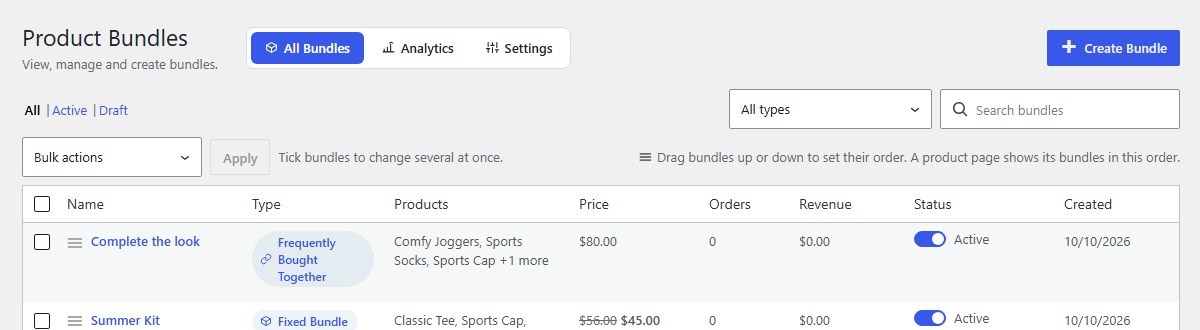
Click Bundles, then Create Bundle
Click Bundles in the WordPress menu, then Create Bundle at the top right.
-
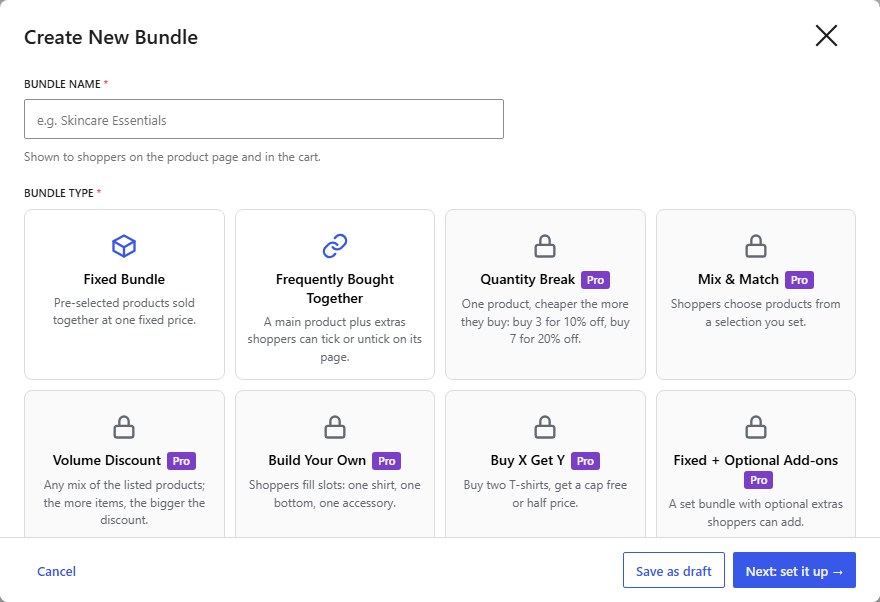
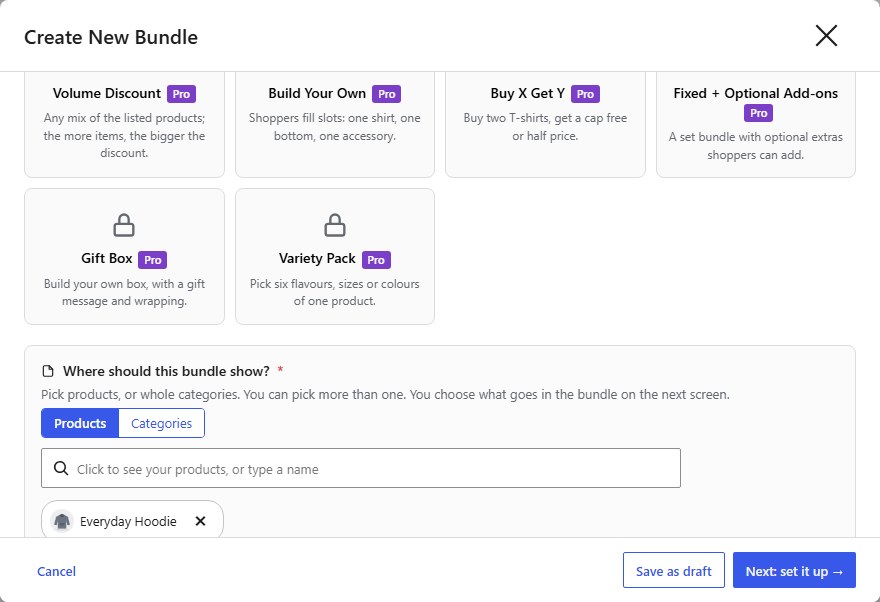
The Create New Bundle popup
It asks three things: the bundle’s name, its kind, and the product pages it shows on. Fields with * must be filled in. Kinds marked Pro need Nanflows Bundles Pro.
-
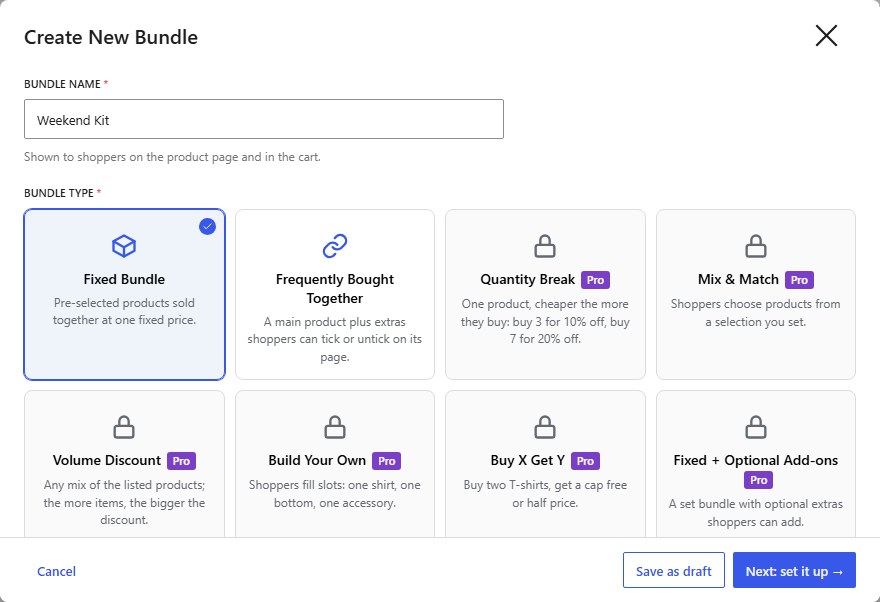
Type the name and choose Fixed Bundle
Shoppers see the Bundle name on the product page and in the cart. Here: Weekend Kit. Then click Fixed Bundle: you choose the products, and shoppers buy them all together at one price. Not sure which kind fits? See Which bundle should I use?
-
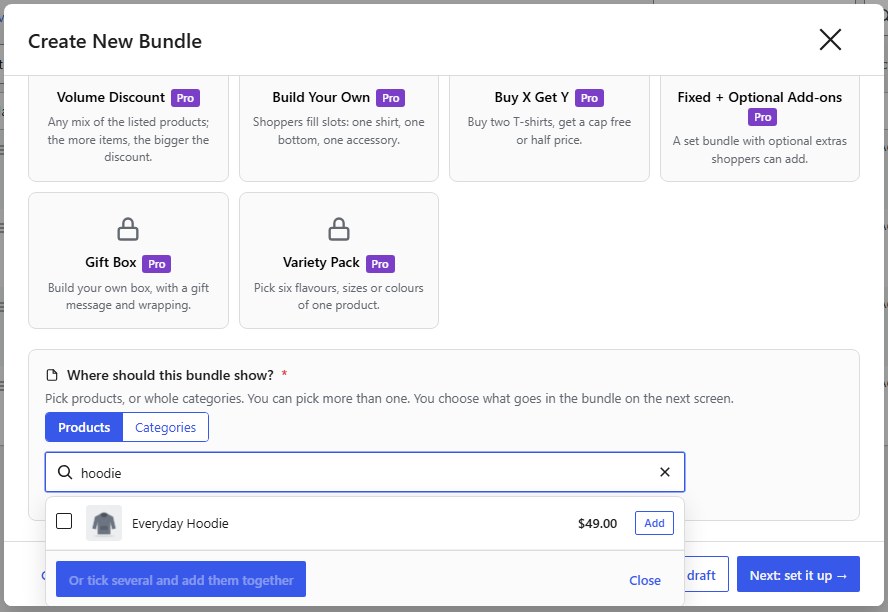
Choose where the bundle shows
Under Where should this bundle show?, click the box to see your products, or type a name. Click Add next to each product page that should offer the bundle. The Categories tab picks whole categories instead: every product in them gets the bundle, including products you add later.
Tip A product that already offers a live bundle says so in this list, so you don’t crowd one page by mistake.
-
Click Next: set it up
The pages you picked appear under the box. Click Next: set it up to open the editor. Save as draft keeps the bundle to finish later; drafts are never shown to shoppers.
-
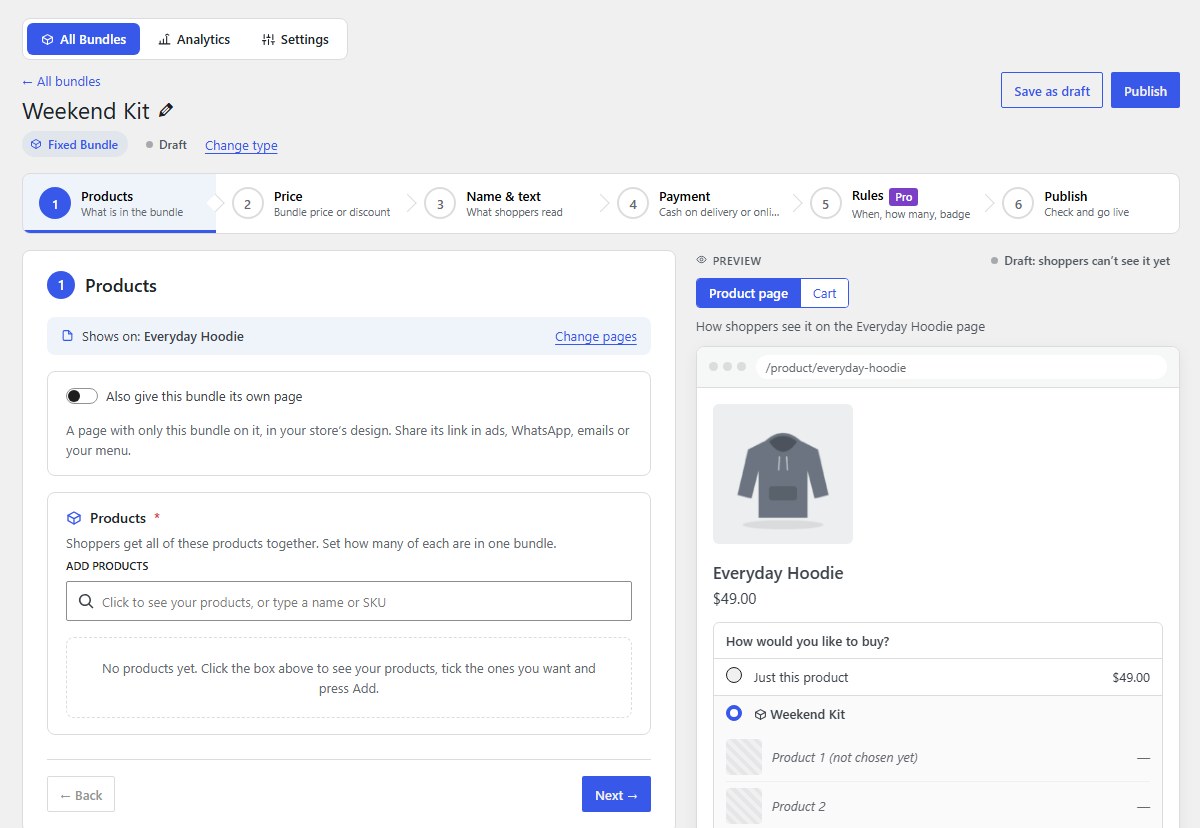
The editor: six steps, with a live preview
The steps are along the top: 1. Products, 2. Price, 3. Name & text, 4. Payment, 5. Rules and 6. Publish. Click any step, or use Next and Back. On the right, the Preview shows the bundle as shoppers will see it on the product page, and changes as you type. If something required is missing, the step turns red and says what to fill in.
-
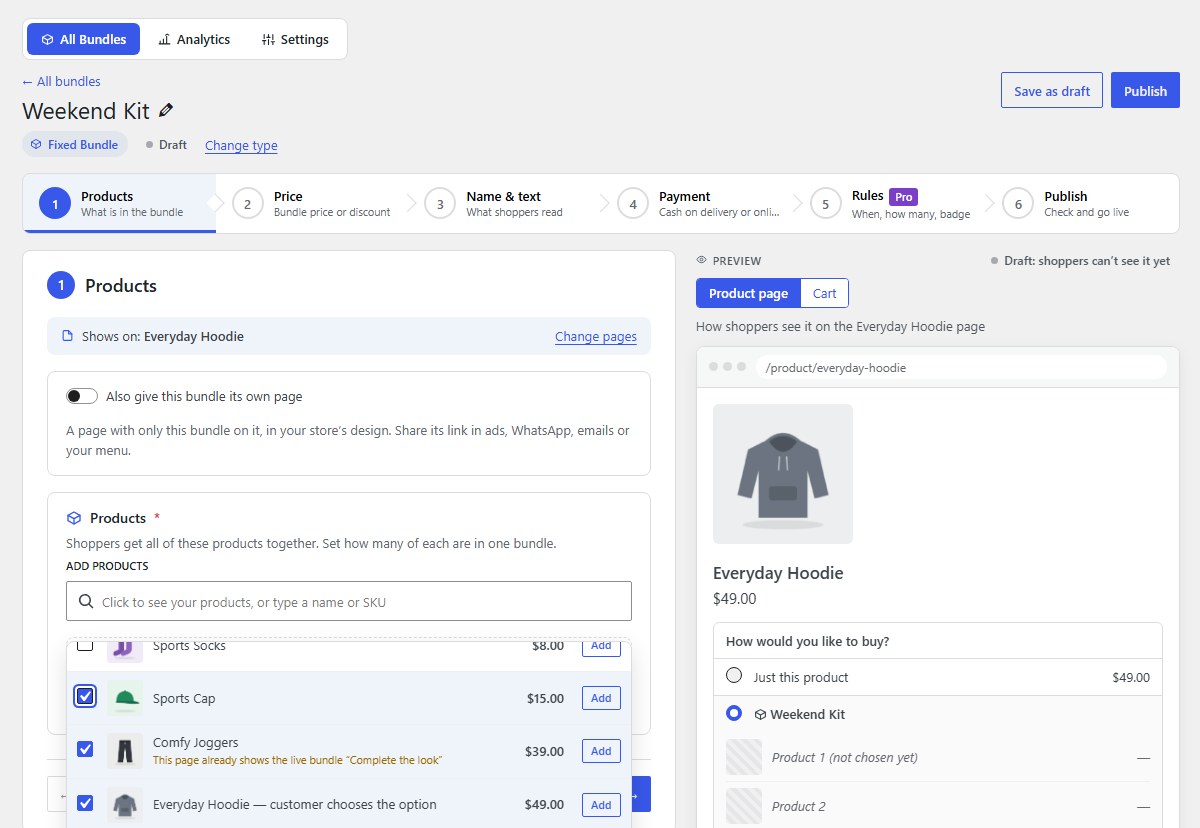
Products: tick the products and click Add
Click the Add products box to see your products, or type a name or SKU. Tick several and click Add selected, or click Add on one at a time.
-
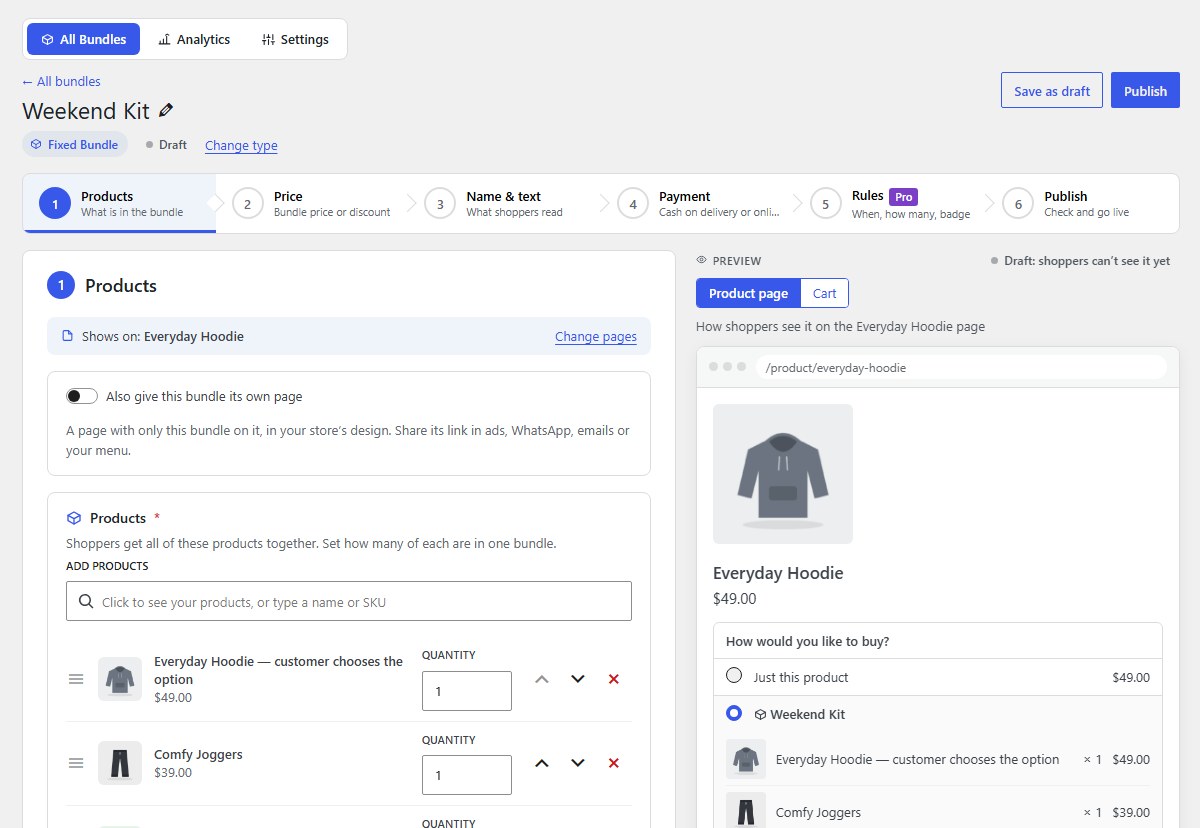
Check the products and quantities
Set the Quantity of each product in one bundle (for example 2 pairs of socks). Drag the handle or use the arrows to change the order, and the red cross to remove one. For a product with sizes or colours, shoppers choose the size on your shop (customer chooses the option); add one size from the list instead to fix it.
Tip A fixed bundle needs at least two items: two products, or one product with a quantity of 2.
-
Give it its own page (optional)
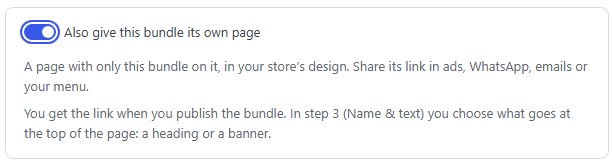
Turn on Also give this bundle its own page to get a page with only this bundle, in your theme’s design. Share the link in ads, WhatsApp, emails or your menu. The link appears once the bundle is published.
-
Price: set the bundle price
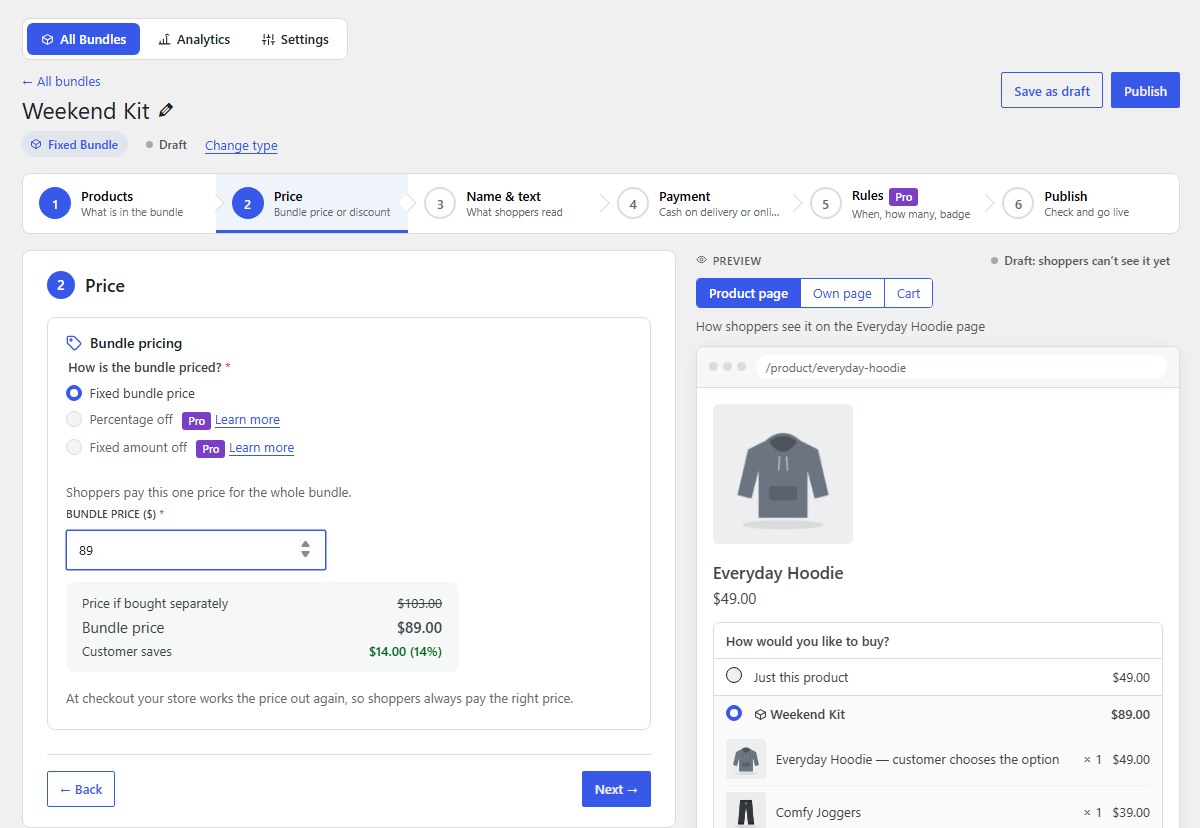
Click 2. Price. With Fixed bundle price, type what shoppers pay for the whole bundle: here $89. The box under it shows the price if bought separately ($103) and what the customer saves ($14, 14%). Percentage off and Fixed amount off are in Pro. See Prices and discounts.
-
Name & text: what shoppers read
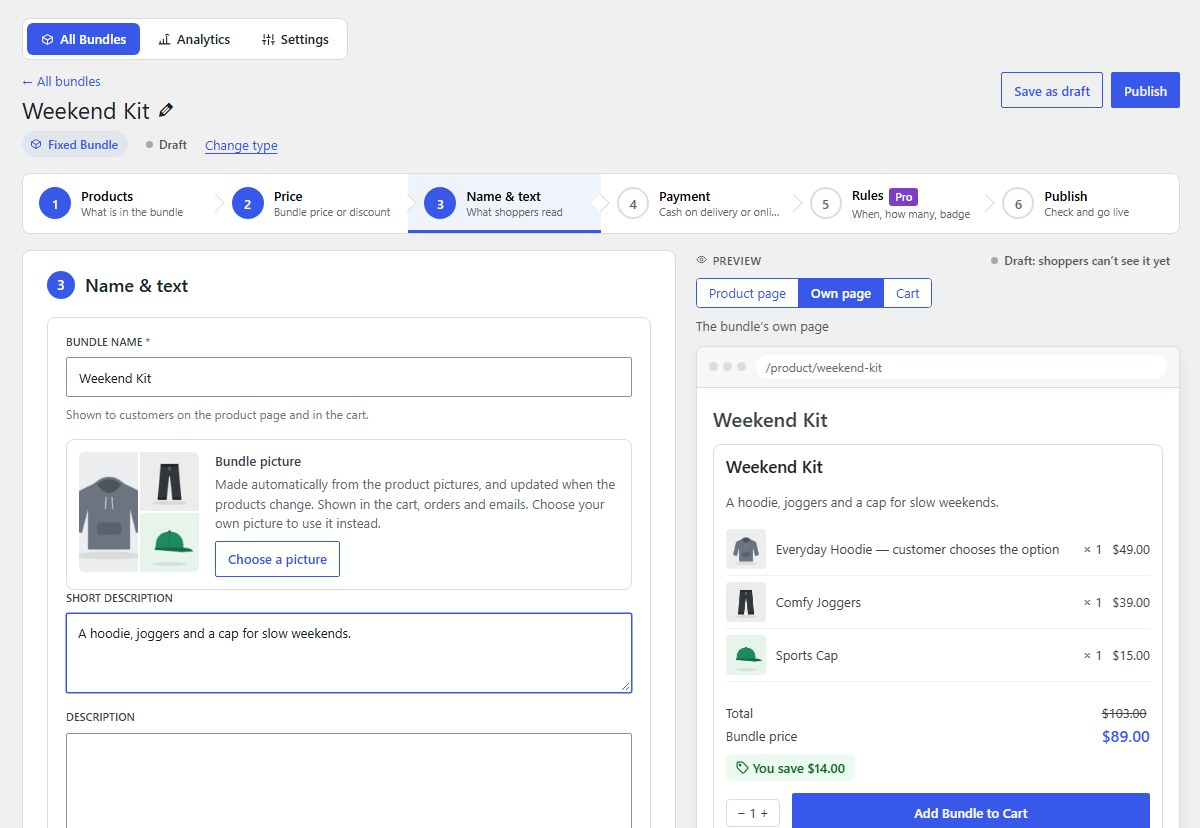
Click 3. Name & text. Change the name if you like, and add a Short description (shown under the bundle’s name on the product page) and a longer Description (shown on the bundle’s own page). The Bundle picture is made for you from the product pictures; Choose a picture to use your own. SKU is optional.
-
The top of the bundle’s own page
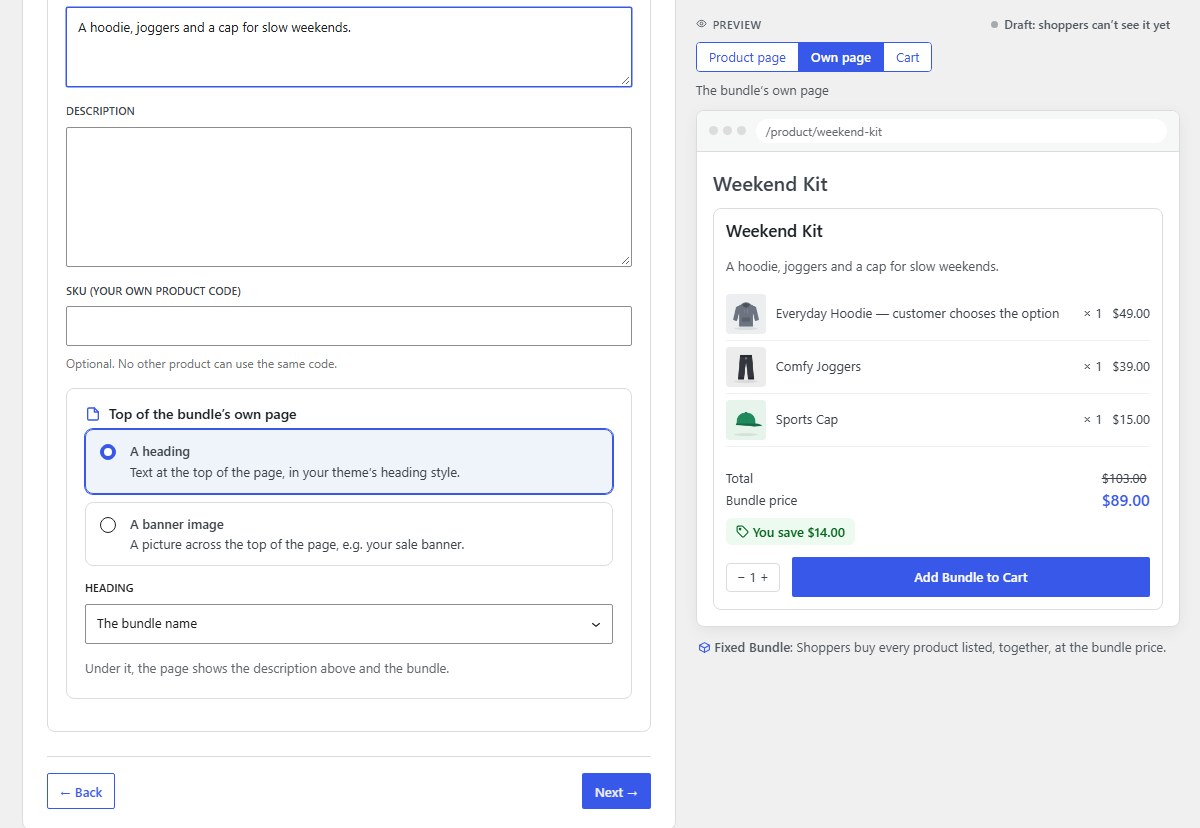
If the bundle has its own page, choose what goes at the top: A heading (the bundle name, your own words, or none) or A banner image, such as your sale banner (best 1600 × 450 px, with an optional 400 × 200 px one for phones).
-
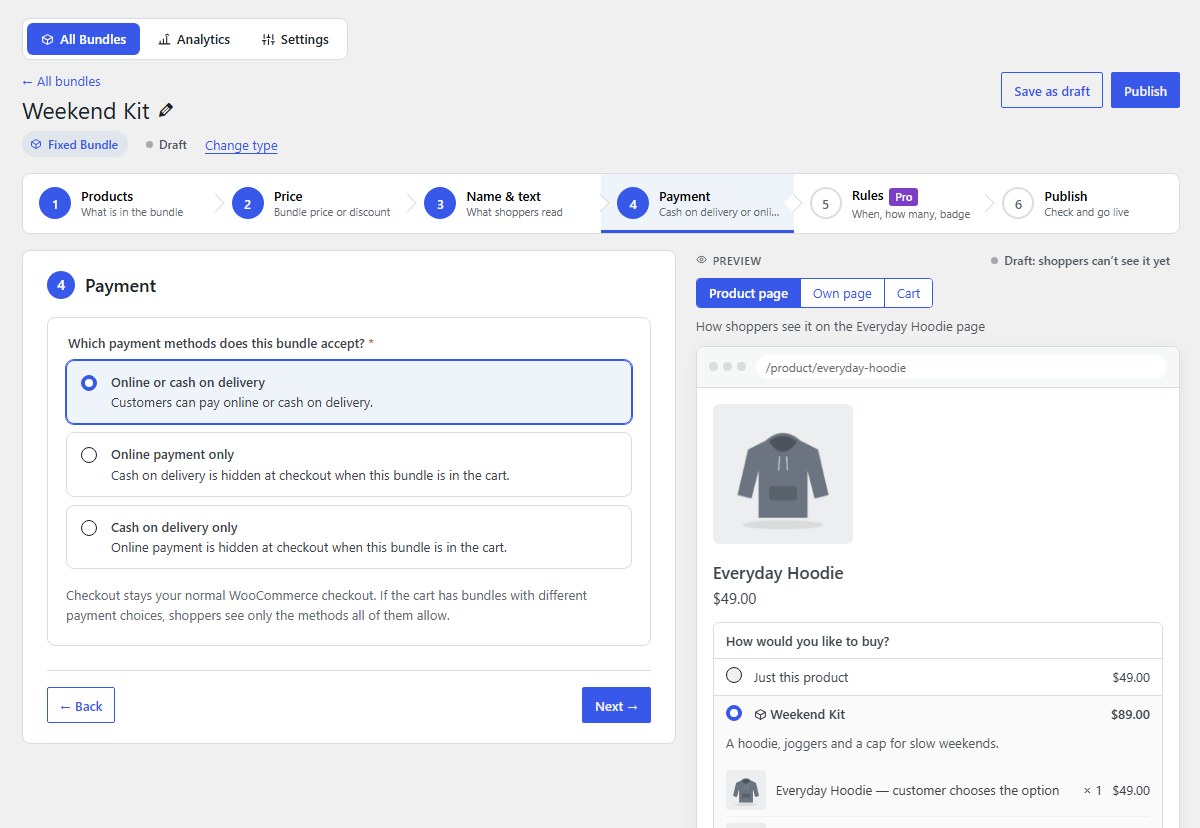
Payment: online, cash on delivery, or both
Click 4. Payment. Online or cash on delivery suits most bundles. Choose Online payment only for big or expensive combos, so cash on delivery is hidden at checkout while this bundle is in the cart. See Payment.
-
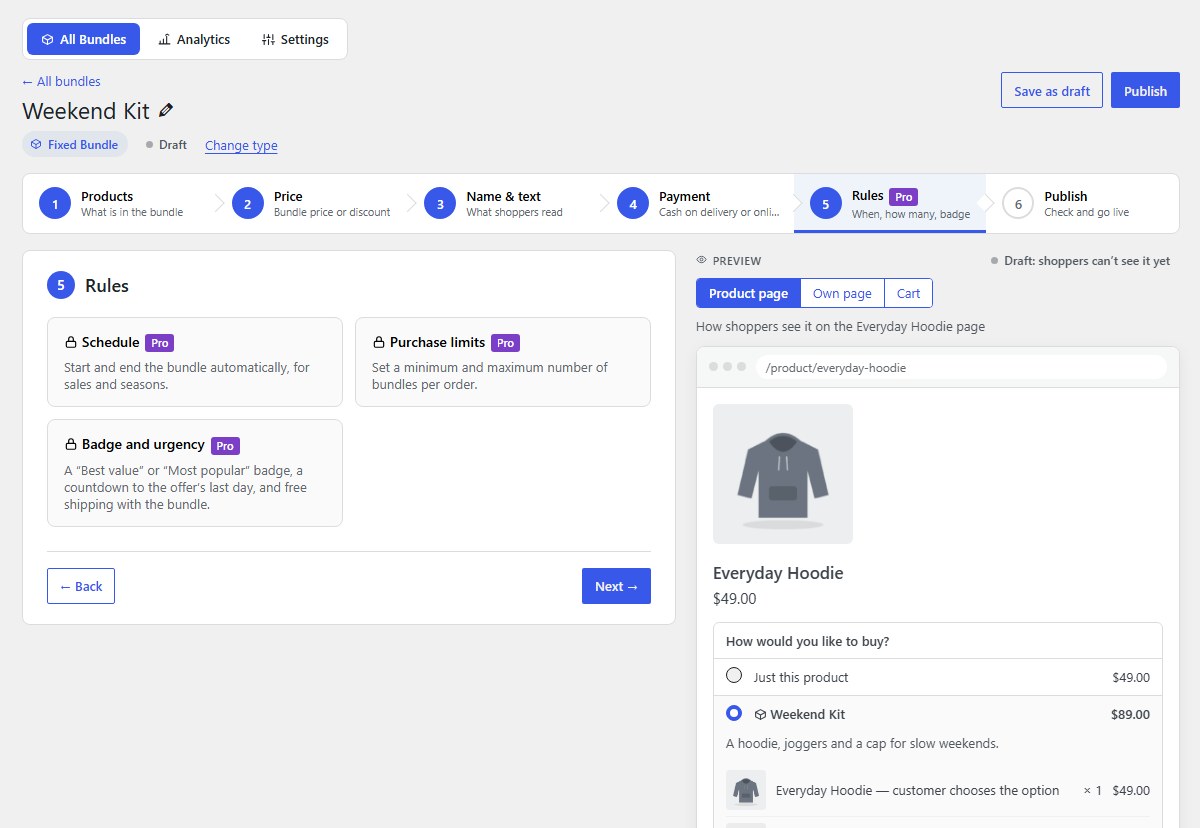
Rules (Pro, optional)
5. Rules sets dates the bundle is on sale, how many fit in one order, and a badge, countdown and free shipping. These are Pro features; without Pro the cards are locked and you can skip this step. See Rules, badge and urgency.
-
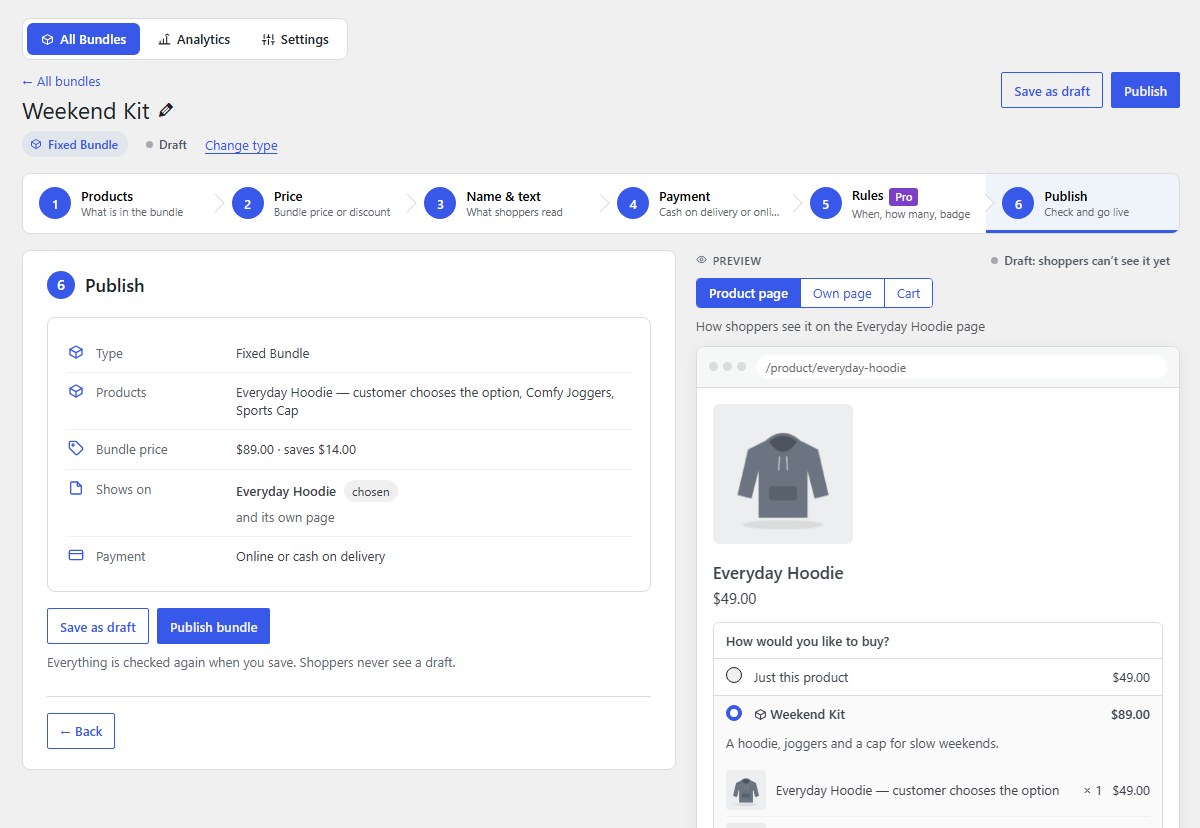
Publish: check and go live
6. Publish sums up the type, products, bundle price and saving, the pages it shows on, and payment. Click Publish bundle. Everything is checked again when you save.
-
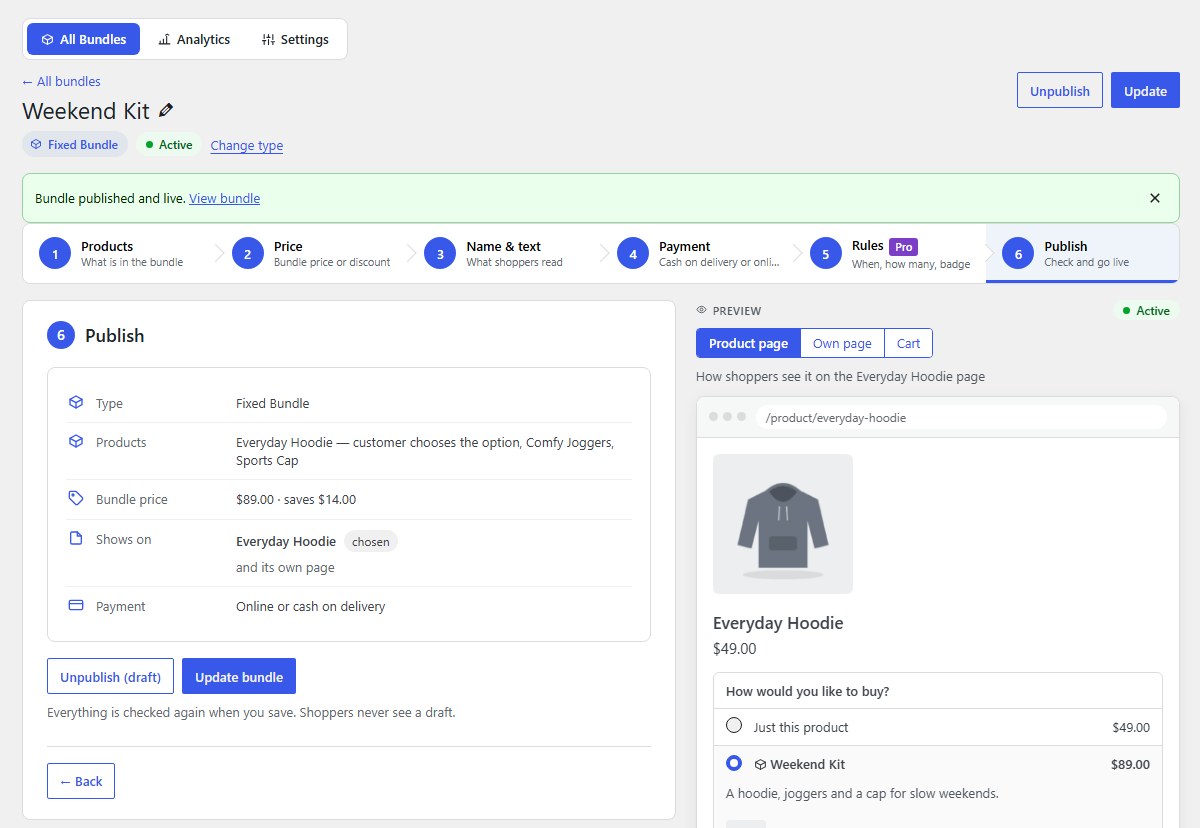
Done: the bundle is live
Bundle published and live. appears at the top, with a View bundle link. From now on the buttons say Update and Unpublish. A published bundle’s kind can’t be changed: create a new bundle to sell a different kind.
-
On your shop
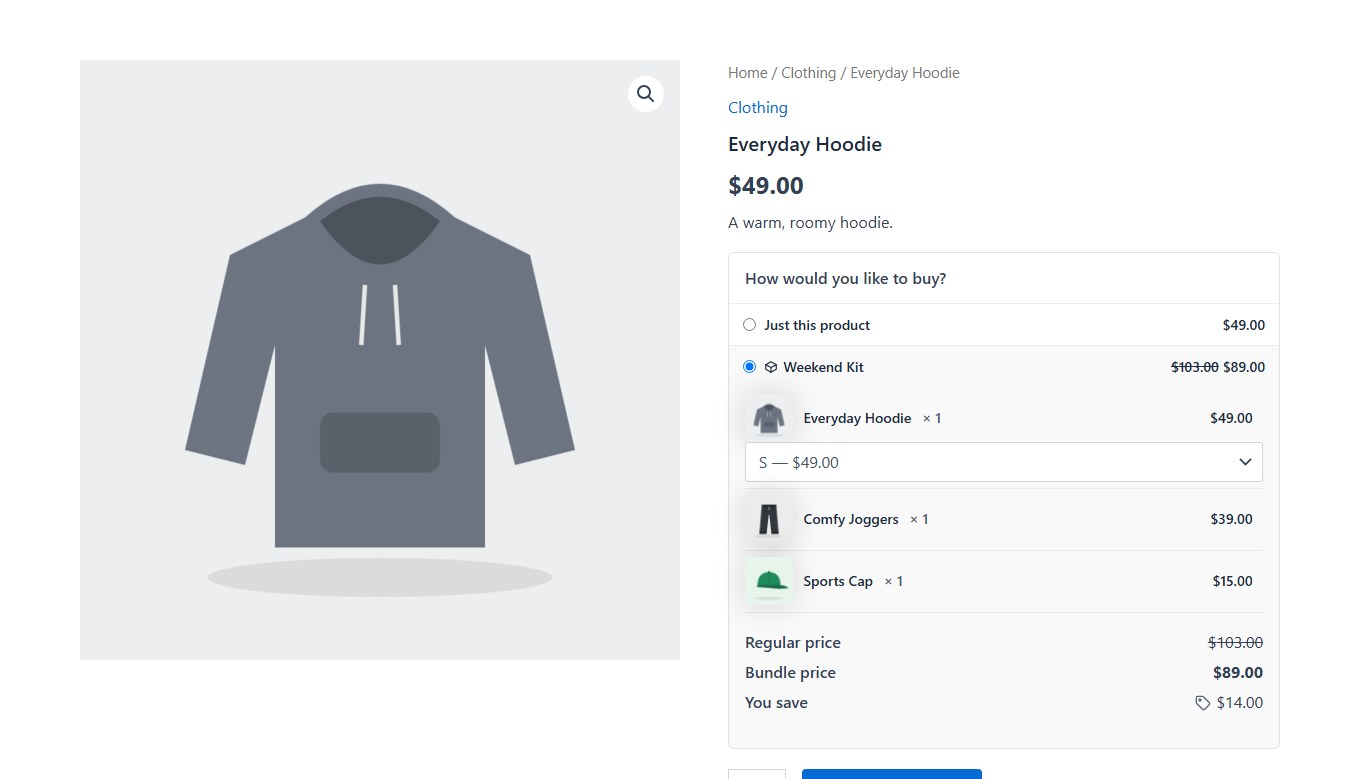
On the product page, shoppers choose Just this product or the bundle. With the bundle chosen they pick sizes, see the regular price, the bundle price and what they save, and add everything with one Add Bundle to Cart button.
-
In the cart: the bundle with its products under it
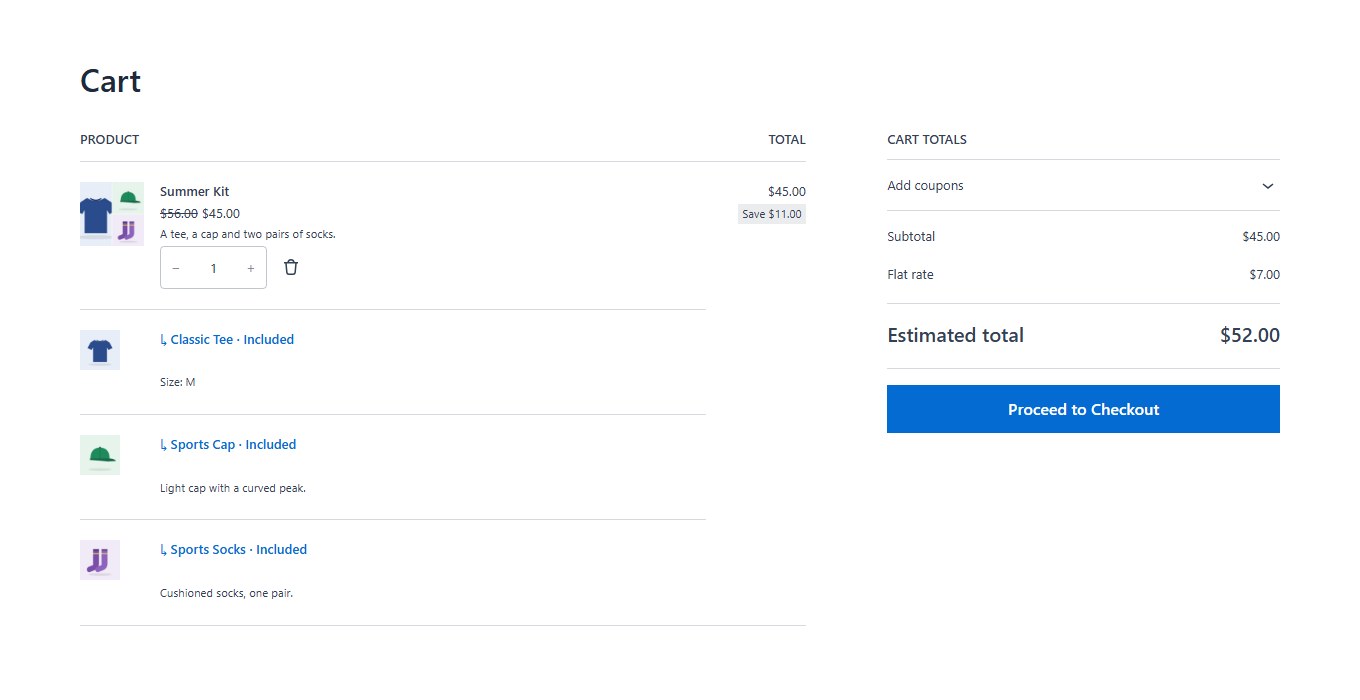
The cart shows the bundle at its price, with the products in it listed underneath. Products inside a bundle follow the bundle’s quantity and can’t be removed on their own, so the discount can’t be kept on part of a bundle. Stock comes off each product as usual.
-
In your orders
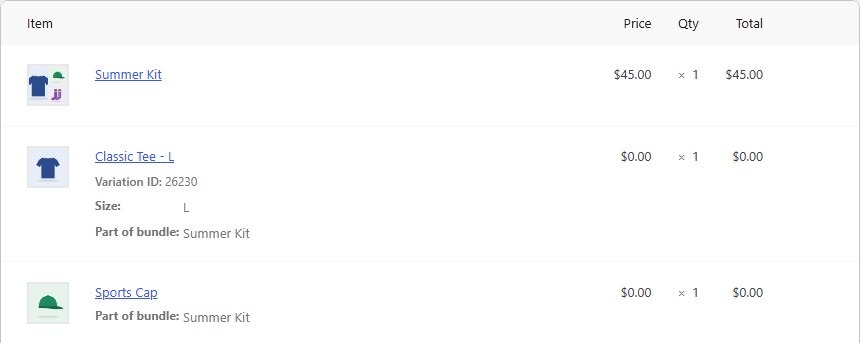
Each order shows the bundle and the products in it, marked Part of bundle, with the sizes chosen. Your shipping, emails and stock work as usual.
-
Change it later
Open Bundles and click the bundle’s name. Change anything and click Update: your shop changes straight away. See Manage your bundles.
Nanflows Bundles · Need help? support@nanflows.com